Posts mit dem Label hefeteig werden angezeigt. Alle Posts anzeigen

Donnerstag, 9. Januar 2014

Geschenke aus meiner Küche


Weihnachten ist jetzt ja schon ein Weilchen vorüber, aber endlich komme ich dazu, euch zu zeigen, was ich an Weihnachten als Mitbringsel aus meiner Küche verschenkt habe. Das war das erste Mal, dass ich für jeden aus meiner Familie und ein paar Freunde etwas Leckeres zu dem eigentlichen Geschenk dazu gemacht habe, aber das will ich definitiv in den kommenden Jahren so weiterführen! Bei den Beschenkten kam es auch gut an :).

So Christmas is over for a while now, and finally I get around to show you the presents from my kitchen I gave my family and friends for Christmas. It was the first time I did that for all of them in addition to the actual present but I definitely plan to make that a new tradition! They all thought that was a good idea, too :).


Ich habe für alle eine große Portion gebrannte Mandeln und Weihnachtsmandeln gemacht. Das Rezept für die gebrannten Mandeln habe ich ja bereits gepostet - ihr findet es hier. Die Weihnachtsmandeln habe ich auf Assatas Blog Neulich im Leben entdeckt und war sehr begeistert von der Kombination von dunkler Schokolade und gebrannten Mandeln. Die werde ich wohl in mein Weihnachtsrepertoire aufnehmen :).

I made a big batch of sugar-crusted almonds and Christmas almonds for everyone. I already posted my recipe for sugar-crusted almonds a while ago - you can read it here. I found the recipe for the Christmas almonds on Assata's blog Neulich im Leben (German only in the link) and loved the combination of dark chocolate and sugar-crusted almonds. I think they will become part of my Christmas repertoire now :).


An Weihnachten traf ich auch endlich mal wieder eine meiner ältesten Freundinnen - obwohl sie fast jedes Wochenende bei ihren Eltern in unserer Heimatstadt ist, haben wir uns über ein halbes Jahr nicht mehr gesehen. Daher hatte ich ihr nicht einmal was zum Geburtstag geschenkt ... Somit gab es für sie noch ein Zusatzgeschenk, nämlich scharfe Honignüsse. Das Rezept hierfür stammt von Connys Blog Seelenschmeichelei.

(Eigentlich wollte ich auch noch mehr Leuten Honignüsse schenken. Das geht nur leider nicht, wenn man die Hälfte verbrennen lässt. Tja.)

On Christmas, I finally got to see one of my oldest friends again - even though she spends almost every weekend at her parents' in our hometown, we didn't meet up for more than half a year. So I hadn't even given her a birthday present ... Therefore she got a bit of an extra - honey-roasted spicy nuts. The recipe for this you can find on Conny's blog Seelenschmeichelei (German link again, sorry).

(Originally I had planned to give those honey-roasted nuts to more people. That's not possible when you burn half of them, though. Bummer.)


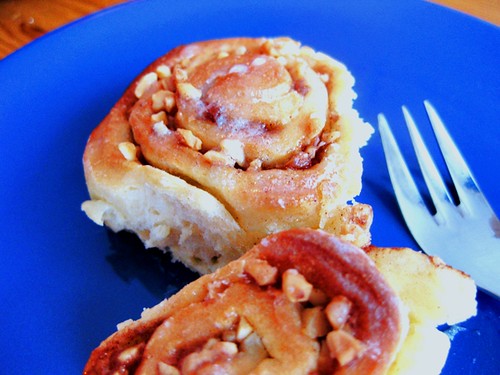
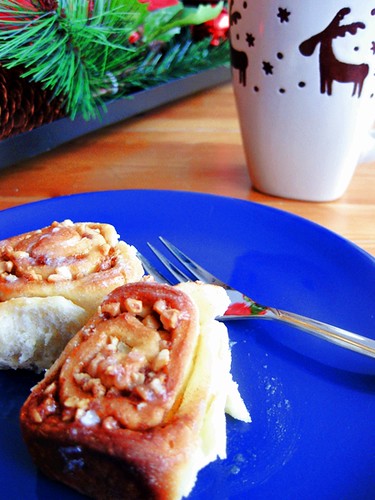
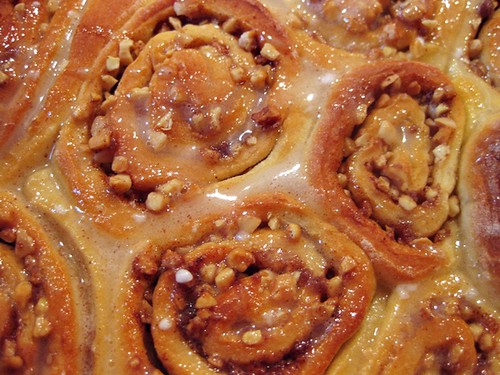
Und zu guter Letzt zeige ich euch noch, was es an Weihnachten bei uns zum Tee gab (neben dem Plätzchenteller, natürlich) - einen Zimtzucker-Tannenbaum. Die Idee habe ich von einer Bekannten abgeguckt, die einen ähnlichen Baum zu einer Weihnachtsfeier mitgebracht hat - leider ist meiner nicht so ganz tannenbaum-mäßig geraten, wie ich es mir gewünscht hätte. Zu machen ist der Baum ganz einfach: Man braucht dazu ein Hefeteig-Grundrezept (wie zum Beispiel dieses hier). Den Hefeteig rollt man aus, bestreicht ihn mit einer Butter-Zucker-Zimt-Mischung (unserer hätte etwas mehr Füllung vertragen können), schneidet ihn in Rechtecke in etwa der gewünschten Baumgröße und legt diese aufeinander. Dann schneidet man unten áuf jeder Seite je ein Rechteck heraus, um den Stamm zu bekommen, und oben je ein Dreieck auf jeder Seite, um die Spitze herauszubilden. Den Rest schneidet man dann ein und dreht die Zweige so, dass sich die Schichten schön auffächern. Und dann wird das Ganze einfach wie ein Hefezopf gebacken.

Hmm, ich hoffe, diese Erklärung macht Sinn ... Wenn nicht, fragt ruhig einfach nach!

Habt ihr zu Weihnachten auch etwas Selbstgemachtes verschenkt?

And last, but not least, I want to show you what we had for tea on Christmas (in addition to a lot of Christmas cookies, of course) - a cinnamon roll Christmas tree. I stole the idea from an acquaintance who brought a similar tree to a Christmas party. Unfortunately mine didn't turn out quite as Christmas tree-like as I had wanted. It's really easy to make, though: You need a basic yeast dough recipe like this one. Roll out the dough and brush it with a butter-sugar-cinnamon mixture (ours could have used a little bit more of that), then cut it into rectangles of roughly the desired tree size and stack them onto each other. Then cut off two rectangles at the bottom, leaving the "stump" in the middle, and two triangles at the top so you get a tip. Now you cut "branches" from the rest and twist them so that you can see the different layers. Finally, just put it in the oven and bake it like a plaited yeast bread.

I hope this explanation makes sense ... If it doesn't, please feel free to ask!

Did you give away homemade presents for Christmas, too?

Samstag, 9. November 2013

[Let them eat cake] Apfel-Zimt-Schnecken


So, die Blogpause ist hiermit beendet! Nach einiger Arbeit, viel Fluchen und der einen oder anderen Träne der Verzweiflung (ja, ich bin manchmal etwas melodramatisch) macht mein Computer wieder, was er soll, und ich kann wieder bloggen. Yay!

Zur Feier des Tages gibt es mal wieder ein Rezept, das hatten wir ja schon ein Weilchen nicht mehr. Diese kleinen, süßen Apfelschnecken habe ich unlängst an einem Sonntag Nachmittag gebacken, einfach weil mir danach war und wir noch Hefe hatten, die aufgebraucht werden musste. Es musste alles mit Zutaten gehen, die ich im Haus hatte, da überhaupt nicht geplant - so habe ich nur drei kleine Äpfel verwendet statt der vier mittelgroßen, die vom Rezept vorgesehen waren, und der Calvados, den das Rezept vorsah, blieb auch weg (das Rezept hat den aber eh bei den Zutaten auch vergessen ;) ...). Hat aber trotzdem alles geklappt und gut geschmeckt!

Und damit nehme ich auch zum ersten Mal an einem Blogevent teil: Persis von Ein Keks für unterwegs sucht für den Herbst alle möglichen Rezepte rund um den Apfel. Das Event habe ich auf einem anderen Blog entdeckt und reihe mich gern mal ein! Zum Glück ist der Laptop rechtzeitig vor Ablauf der Teilnahmefrist wieder heile geworden ;) ...

Keks unterwegs

So, the blog hiatus hereby is over! After some work, a lot of cursing and one or the other tear of despair (yes, I'm a bit melodramatic), my computer is working again like it should, and I can blog again. Yay!

In honour of the occasion, let's have a recipe again! We didn't have one of those for quite some time ... I made these small, sweet apple rolls a while ago on a Sunday afternoon, just because I felt like it and we still had some yeast that had to be used. Since it was a spontaneous decision, I had to work with what I had at home - so I used only three small apples instead of the four medium-sized ones the recipe demanded, and I also left out the Calvados the recipe wanted (but well, the recipe had forgotten to list it in the ingredients as well ;) ...). It still all worked out and tasted great!

This is also the first time I'm taking part in a blog event: Persis of Ein Keks für unterwegs is looking for recipes all around apples. I found the event on another blog and I'm happy I can take part! Fortunately the laptop was repaired in time for the deadline ;) ...


Und hier kommt das Rezept:

Apfel-Zimt-Schnecken

Zutaten
240 g Weizenmehl   
20 g Hefe   
4 EL Zucker   
1 TL Vanillezucker   
1 Prise Salz   
50 g Margarine (oder Butter)  
1 Ei   
65 ml Milch   
4 Äpfel   
1 1/2 TL Zimt   
abgeriebene Schale von 1 Zitrone
1 EL Zitronensaft

Milch bis auf 2 Esslöffel im Topf erwärmen, bis sie etwa lauwarm ist. Mit einer Prise Zucker und der Hefe verrühren, bis sich die Hefe aufgelöst hat. 

Mehl, 1 1/2 Esslöffel Zucker, Vanillezucker und Salz vermischen. Margarine zerlassen, mit dem Ei unter das Mehl-Gemisch geben, Hefemilch dazugeben und zu einem glatten Teig verarbeiten. Teig zugedeckt an einem warmen Ort ca. 30 Minuten gehen lassen.

Ofen auf 180°C vorheizen. Für die Füllung Äpfel fein würfeln, mit restlichem Zucker, Zimt, Zitronenschale und Zitronensaft ca. 4 Minuten bei mittlerer Hitze andünsten und abkühlen lassen.

Teig nochmals gut durchkneten, zu einem Rechteck ausrollen, Apfelmasse darauf verteilen und von der kürzeren Seite her aufrollen. Apfelrolle in 12 Scheiben schneiden, auf ein mit Backpapier ausgelegtes Backblech legen und nochmals ca. 20 Minuten aufgehen lassen. Apfelschnecken mit restlicher Milch bestreichen, im vorgeheizten Backofen auf mittlerer Schiene ca. 20 Minuten backen, abkühlen lassen und am besten frisch servieren.


And here is the recipe:

Apple-cinnamon rolls

Ingredients
240 g flour
20 g yeast
4 table spoons sugar 
1 tea spoon vanilla sugar   
1 pinch of salt   
50 g margarine (or butter)  
1 egg
65 ml milk
4 apples
1 1/2 tea spoons cinnamon
zest of 1 lemon
1 table spoon lemon juice

Heat the milk apart from two table spoons in a saucepan until it's lukewarm. Stir in a pinch of sugar and the yeast until well dissolved. 

Mix the flour, 1 1/2 table spoons sugar, the vanilla sugar and salt. Melt the margarine and stir into the flour mixture together with the egg. Add the yeast milk and knead until you get a smooth dough. Cover the dough and let it rest for approx. 30 minutes in a warm place.

Preheat the oven to 180°C. For the filling, cut the apples in fine cubes and stew for approx. 4 minutes with the rest of the sugar, cinnamon, lemon cest and lemon juice at medium heat.

Knead the dough well another time, roll out in a rectangle, spread the apple filling on it and roll it up from the shorter side. Cut into 12 slices, place on a baking sheet lined with parchment paper and let rest for another 20 minutes. Brush with the remaining milk and bake on the middle rack for about 20 minutes. Let cool and serve fresh if possible.

Was backt ihr gern, wenn ihr am Sonntag Nachmittag Lust auf was Süßes habt? Oder was sind eure Lieblings-Apfelrezepte?

What do you bake when you want something sweet on a Sunday afternoon? And what are your favourite apple recipes?

Sonntag, 23. Juni 2013

[Let them eat cake] Brioches mit Brombeerkonfitüre


Erinnert ihr euch noch an die Lecker Bakery 3, die vor einiger Zeit durch alle Blogs geisterte? Ja, ich weiß, das ist schon sehr lange her, und inzwischen sind alle schon bei der neuen Sweet Paul, Deli und wie sie alle heißen - aber ich brauch eben manchmal etwas länger.

Nein, im Ernst, es gibt einfach zu viele schöne Rezepte, als dass ich sie alle nachbacken könnte, aber die Lecker Bakery hole ich gern immer mal wieder hervor und stöbere darin. Vor einiger Zeit (*hust* siehe oben) war dann mal wieder ein Rezept daraus angesagt, für das Rollenspiel mit Freunden. Und weil ich Hefeteig einfach sehr gern mag, wurden es die Brioche mit Brombeerkonfitüre.

Gebacken habe ich sie übrigens in der Muffinform, da ich keine Briocheförmchen besitze (noch nicht?). Leider erwiesen sich die Muffinpapierförmchen, die ich dazu benutzte, als keine gute Wahl - sie hingen etwas mehr an den fertigen Brioche, als sie sollten ... Insofern würde ich euch raten, wenn ihr eine Muffinform benutzt, sie lieber vielleicht gut zu fetten oder Silikonförmchen zu benutzen - aber vielleicht hatte ich auch nur Pech mit meinen Förmchen, wer weiß? Hübsch sahen sie immerhin trotzdem aus, und dem Geschmack hat es keinen Abbruch getan - wie schon bei den Upside-Down-Buchteln ist der Hefeteig wunderbar locker und lecker, und die Kombination mit der Brombeer-Konfitüre (wobei sicher auch jede andere leckere Marmelade ginge) war wirklich klasse.

Do you remember the Lecker Bakery 3 which went through all the blogs a while ago? Yes, I know that was some time ago and is kinda an old hat now, with everyone moving on to the new Sweet Paul, Deli and what else there is - but sometimes I'm a bit slow.

No, seriously, there are way too many lovely recipes out there that I could bake them all, but I really like getting the Lecker Bakery out from time to time and leaf through it. Some time ago (*cough* see above) it was time for a recipe out of that magazine again, for a gaming session with friends. And since I really like a yeasty dough, I chose the brioche with blackberry jam.

I baked them in a muffin pan since I don't own any brioche pans (yet?). Unfortunately, the paper cups I used turned out to have been a bad choice - they were very clingy when we tried to remove them from the finished brioche ... Therefore I'd recommend if you use a muffin pan, better grease it well or use silicone baking cups - but maybe I was just unlucky with my paper cups, who knows? But they were pretty nevertheless, and the taste did not suffer - like with the upside-down buchteln, the yeast dough is lovely, very fluffy and tasty, and the combination with the blackberry jam was really great (though you could certainly use any other delicious jam, too).


Brioche mit Brombeerkonfitüre

Zutaten
200 ml Milch
1 Würfel Hefe
500 g Mehl
50 g Zucker
Salz
1 Ei
100 g weiche Butter
1 Eigelb
1 EL Milch
ca. 150 g Brombeerkonfitüre
etwas Puderzucker zum Bestäuben

Milch nur lauwarm erwärmen. Hefe hineinbröckeln und unter Rühren auflösen.
Mehl, Zucker, eine Prise Salz und Ei in eine (große!) Schüssel geben. Hefemilch zugießen. Mit den Knethaken des Rührgeräts unterrühren. Butter in Flöckchen unterkneten, bis der Teig geschmeidig ist. Formt er sich zur Kugel, ca. 3 Minuten weiterkneten.
Abgedeckt an einem warmen Ort ca. 40 Minuten gehen lassen.
Die Mulden einer Brioche-Backform oder einer Muffinform fetten. Hefeteig auf etwas Mehl kurz durchkneten. Aus ca. 2/3 des Teigs 12 gleich große Kugeln formen und in die Briocheform oder Muffinform setzen. Den restlichen Teig ebenfalls zu 12 kleineren Kugeln formen und auf einem Blech oder Teller zur Seite stellen. Alle Kugeln zugedeckt ca. 20 Minuten gehen lassen. Eigelb und Milch verquirlen.
Backofen auf 200°C vorheizen. In die Teigkugeln in der Form mit einem bemehlten Kochlöffelstiel ein Loch drücken und mit je ca. 1 TL Konfitüre füllen. Die kleinen Kugeln auf einer Seite mit etwas Eiermilch bestreichen. Mit der bestrichenen Seite auf die Konfitüre setzen.
Die Oberfläche der Brioche mit der Eiermilch bestreichen und in den Ofen schieben. Nach ca. 15 Minuten herausnehmen und abkühlen lassen. Mit Puderzucker bestäuben und warm oder kalt genießen, mit oder ohne etwas Butter dazu!


Brioche with blackberry jam

Ingredients
200 ml milk
1 cube of yeast
500 g flour
50 g sugar
salt
1 egg
100 g soft butter
1 egg yolk
1 tablespoon milk
approx. 150 g blackberry jam
some powdered sugar for dusting

Warm the milk until it's only lukewarm. Crumble the yeast into it and stir until dissolved.
Put flour, sugar, a pinch of salt and the egg in a (big!) bowl. Pour in the yeast milk. Mix with the dough hook of your hand mixer. Knead in the butter in small pieces until the dough is smooth. When it's forming into a ball, knead for another 2 minutes.
Leave to rest in a warm place for about 40 minutes, covered by a tea towel.
Grease the moulds of a brioche pan or muffin pan. Knead the dough a bit on some flour. Using about 2/3 of the dough, shape 12 balls of roughly the same size and place in the brioche or muffin pan. With the rest of the dough, shape another 12 smaller balls and place on a baking sheet or plate. Cover with a tea towel and let rest another 20 minutes. Whisk together the egg yolk and milk.
Preheat the oven to 200°C. Make a hole in the dough balls with the floured end of a wooden spoon and fill with approx. 1 teaspoon jam each. Brush the smaller balls on one side with some egg milk and put on the jam with the brushed side down.
Brush the surface of the brioches with the egg milk and put in the oven. Bake for approx. 15 minutes, then take them out and let them rest a bit. Dust with powdered sugar and enjoy warm or cold, with some butter or plain!


Bezugsquellen/sources:
Muffinförmchen/muffin paper cups: Blueboxtree
Servietten/napkins: Rossmann
Teller/plate: IKEA

Samstag, 30. März 2013

[Let them eat cake] Hefe-Osterhasen


Gerade noch pünktlich zum Osterfest wollte ich euch noch eine kleine Idee für den österlichen Brunch oder Kaffee zeigen. Diese kleinen Kerlchen gehen sehr schnell (wenn man von der Gehzeit des Hefeteigs absieht) und sehen einfach nett aus.

Das erste Mal gemacht habe ich sie vor zwei Jahren - damals entstanden auch noch welche, die dem Betrachter ihr Gesicht zeigten, aber mir gefiel die Rückseiten-Variante irgendwie viel besser. Also gibt es dieses Jahr Hasenpopos :p. Eigentlich wollte ich die Schwänzchen mit Hagelzucker verzieren, aber ich habe keinen bekommen :(. Die gehackten Mandeln waren aber auch lecker. Varianten, die ich mir auch noch vorstellen könnte, wären Schokoglasur oder bunte Streusel usw. Da kann man sich austoben ;).

Just in time for Easter I wanted to show you a little idea for your Easter brunch or coffee. These little guys are quick (apart from the time the yeast dough needs to rest) and are just cute.

I made them the first time two years ago - at that time, I also made some looking at the viewer but somehow I liked the backside variant much better. So here are some bunny bums this year :p. Originally I wanted to use decorating sugar for the tails but I didn't get any :(. But the chopped almonds were tasty, too. Other variants I could imagine would be painting the tails with chocolate or adding sprinkles, etc. Feel free to play around ;)!


Hefe-Osterhasen

Zutaten
200 ml Milch
1 Würfel Hefe
500 g Mehl
50 g Zucker
Salz
1 Ei
50 g weiche Butter
1 Ei (und ggf. etwas Milch) zum Bestreichen
Gehackte Mandeln, Hagelzucker o.ä. für die Schwänzchen

Milch nur lauwarm erwärmen. Hefe hineinbröckeln und unter Rühren auflösen.
Mehl, Zucker, eine Prise Salz und Ei in eine (große!) Schüssel geben. Hefemilch zugießen. Mit den Knethaken des Rührgeräts unterrühren. Butter in Flöckchen unterkneten, bis der Teig geschmeidig ist. Formt er sich zur Kugel, ca. 3 Minuten weiterkneten.
Abgedeckt an einem warmen Ort ca. 40 Minuten gehen lassen.
Nach dem Gehenlassen kurz durchkneten und in so viele Stücke aufteilen, wie es Hasen werden sollen. Ich habe sieben Hasen gemacht, die waren aber schon recht groß - man kann aus der Teigmenge bestimmt 10 - 12 Hasen machen. Man nimmt nun ein Teigstück und teilt es noch einmal auf. Ca. 2/3 werden der Körper, der Rest wird noch einmal unterteilt - noch einmal 2/3 werden der Kopf, aus dem Rest werden die Ohren und der Schwanz. Die Größen sind hier nur ungefähre Angaben; probiert einfach ein bisschen rum, bis die Aufteilung stimmt. Körper und Kopf werden zu Kugeln geformt und dann leicht plattgedrückt. Diese Kreise auf einem Backblech aneinander setzen - dabei vorher mit verschlagenem Ei einpinseln, damit sie besser halten. Die Ohren sind zwei rundliche Würste/Ovale, die ebenfalls mit Ei angeklebt werden. Eine kleine Kugel für das Schwänzchen formen und sie zuerst mit der Oberseite in das Ei und dann in Hagelzucker oder gehackte Mandeln tauchen. Mit Ei auf das Häschen kleben und den Rest auch noch bepinseln.
Bei 200°C im vorgeheizten Backofen ca. 15 Minuten backen lassen. Herausholen, abkühlen lassen und verschenken oder genießen!

Easter bunny buns

Ingredients
200 ml milk
1 cube of yeast
500 g flour
50 g sugar
salt
1 egg
50 g soft butter
1 egg (and maybe some milk) for brushing
Chopped almonds, decorating sugar or similar for the tails


Warm the milk until it's only lukewarm. Crumble the yeast into it and stir until dissolved.
Put flour, sugar, a pinch of salt and the egg in a (big!) bowl. Pour in the yeast milk. Mix with the dough hook of your hand mixer. Knead in the butter in small pieces until the dough is smooth. When it's forming into a ball, knead for another 2 minutes.
Leave to rest in a warm place for about 40 minutes, covered by a tea towel.
Give it a short knead after resting, then split in as much parts as you need. I made seven bunnies but they were on the large size - I think you could make up to 10-12 bunnies from the amount of dough. Now take a piece of dough and split it another time. Approx. 2/3 become the body, the rest is split again - another 2/3 become the head, the rest becomes the ears and the tail. The dimensions are just estimates here just try around for a bit until the proportions are right. Body and head are shaped to balls and then flattened slightly. Place on a baking sheet and attach the head to the body after brushing it with some beaten egg so it adheres better. The ears are formed into roundish pieces/ovals which are also attached with some egg. For the tail, form a little ball and dip it first into the egg and then into the decorating stuff of your choice. Attach to the bunny and brush the rest of the bunny with the egg, too.
Bake for approx. 15 minutes in the pre-heated oven at 200°C. Take out, let cool and either give away as a present or enjoy them yourself!

Fröhliche Ostern!

Happy Easter!

Sonntag, 10. März 2013

[Let them eat cake] Upside-Down-Buchteln


Letzte Woche habe ich mir noch einmal was aus der Lecker Bakery ausgesucht - wir hatten noch einen Hefewürfel, der verbraucht werden musste. Unsere Wahl fiel auf die Upside-Down-Buchteln.

Und da ich mich am Wochenende mit meinen Eltern getroffen habe und ihnen ein paar davon mitbringen wollte, habe ich eine Tüte aus braunem Packpapier gebastelt und sie mit Washi-Tape verziert. Sie wurde ganz süß, und so habe ich sie gleich als Prop für den Foto-Shoot benutzt ;).

Die Buchteln sind sehr lecker - am besten sind sie natürlich, wenn sie frisch aus dem Backofen kommen! Und auch wenn ihre Herstellung für mich eine kleine Katastrophe nach der anderen darstellte (was nicht am tollen Rezept lag, sondern nur an meiner Schusseligkeit!), sind sie mir doch gut gelungen. Die Herstellung des Hefeteigs nach der Lecker-Anleitung war für mich etwas ungewohnt, er ist aber wirklich gut geworden.

Last week I tried another recipe from the Lecker Bakery - we still had a cube of yeast we needed to use, so we decided on the upside-down buchteln. Buchteln are an Austrian pastry, a kind of baked yeast bun usually eaten with custard or jam. Here, they are baked with a glaze of caramellised nuts.

And since I met my parents last weekend and wanted to bring them some of them, I made a bag from kraft paper and decorated it with washi tape. It turned out quite cute, and so I used it as a prop for the photo shoot ;).

The buchteln are very good - of course they are best just after baking! And even though I had one little catastrophe after the other when making them (which was not the fault of the great recipe but only my own ditziness!) they turned out great. Making the yeast dough according to the Lecker instructions was a bit unusual for me but it turned out really good. 


Upside-Down-Buchteln

Zutaten
200 ml Milch
1 Würfel Hefe
500 g Mehl
50 g Zucker
Salz
1 Ei
50 g weiche Butter
100 g Nüsse (z.B. Haselnüsse und Walnüsse)
150 g Zucker
100 g Schlagsahne
50 g Butter

Milch nur lauwarm erwärmen. Hefe hineinbröckeln und unter Rühren auflösen.
Mehl, Zucker, eine Prise Salz und Ei in eine (große!) Schüssel geben. Hefemilch zugießen. Mit den Knethaken des Rührgeräts unterrühren. Butter in Flöckchen unterkneten, bis der Teig geschmeidig ist. Formt er sich zur Kugel, ca. 3 Minuten weiterkneten.
Abgedeckt an einem warmen Ort ca. 40 Minuten gehen lassen.
Haselnüsse und Walnüsse grob hacken. In einer Tarte-Tatin-Form oder Pfanne ohne Fett rösten und herausnehmen. 150 g Zucker und 2 EL Wasser in der Form hell karamellisieren. Mit Sahne ablöschen, 50 g Butter unterrühren. Köcheln lassen, bis der Zucker vollständig gelöst ist. Nüsse unterrühren. Ohne Tarte-Tatin-Form das Karamell in eine Springform oder große, flache Auflaufform füllen.
Teig auf einer bemehlten Arbeitsfläche kurz durchkneten. Zu einer Rolle (5-6 cm Durchmesser) formen. In ca. 15 gleich große Stücke teilen, je zu einer Kugel formen. Dicht an dicht auf die Karamellnüsse setzen. Zugedeckt ca. 30 Minuten gehen lassen.
Backofen auf 200°C vorheizen. Buchteln ca. 20 Minuten backen. Erst ca. 15 Minuten in der Form abkühlen lassen und dann auf eine Platte stürzen. Restlichen Karamell aus der Form auf die Buchteln geben.


Upside-Down-Buchteln (sweet yeast dumplings)

Ingredients
200 ml milk
1 cube of yeast
500 g flour
50 g sugar
salt
1 egg
50 g soft butter
100 g nuts (e.g. hazel nuts and walnuts)
150 g sugar
100 g cream
50 g butter

Warm the milk until it's only lukewarm. Crumble the yeast into it and stir until dissolved.
Put flour, sugar, a pinch of salt and the egg in a (big!) bowl. Pour in the yeast milk. Mix with the dough hook of your hand mixer. Knead in the butter in small pieces until the dough is smooth. When it's forming into a ball, knead for another 2 minutes.
Leave to rest in a warm place for about 40 minutes, covered by a tea towel.
Chop the nuts roughly. Roast without fat in a tarte tatin or pan and remove. Lightly caramelize 150 g sugar and 2 table spoons of water. Deglaze with the cream and mix in the 50 g butter. Let boil lightly until the sugar has dissolved completely. Stir in the nuts. If you don't have a tarte tatin, fill the caramel into a springform pan or big flat casserole.
Knead the dough a bit on a floured surface. Shape into a roll (with a diameter of 5-6 cm). Divide into approx. 15 pieces of the same size and form into balls. Put on the caramel nuts close together. Let rest for about 30 minutes, covered by a tea towel.
Heat the oven to 200°C. Bake the buchteln for about 20 minutes. Leave to cool in the form for about 15 minutes first, then turn out on a plate. If there is caramel left in the form, pour it on top.

Dienstag, 4. Dezember 2012

[Let them eat cake] Zimtschnecken mit karamellisierten Mandeln

Zu dieser Jahreszeit steht mir immer der Sinn nach Backen (Moment, nur in dieser Jahreszeit?). Und so habe ich mich letzten Sonntag in die Küche gestellt und weil ich Lust auf Zimtschnecken hatte, habe ich mein Standard-Zimtschneckenrezept etwas abgewandelt. Das Endergebnis will ich euch nicht vorenthalten!


Zimtschnecken sind ja gerade irgendwie voll in ... Zumindest habe ich sie in den letzten Wochen auf vielen Blogs auftauchen sehen, sowohl englischen als auch deutschen. Das freut mich, denn Zimtschnecken sind für mich eine wunderbare Erinnerung - eine der wenigen Sachen, die meine Mutter gern und gut backt (sie hat es sonst nicht so mit dem Backen). Ich habe diesmal allerdings ein anderes Teigrezept genommen und dieses noch etwas angepasst - vor allem musste eine Messerspitze Kardamom in den Teig, denn meine Mutter hat ihr Rezept tatsächlich aus einem Astrid Lindgren-Buch, und daher gibt Kardamom den Zimtschnecken den richtig schwedischen Touch. Zumindest in meinen Augen :). Und dann wollte ich noch etwas mehr Füllung als "nur" Zimtzucker und hatte da noch so ein paar gehackte Mandeln ...

Im Interesse der Offenheit verrate ich euch, dass das Teigrezept aus einem Weight Watchers-Backbuch stammt. Aber keine Angst, man kann mit diesen Dingern nicht wirklich abnehmen ;). Vor allem nicht, wenn man wie ich feststellen muss, dass M2 keine Zimtschnecken mag. Also habe ich die Hälfte der leckeren Dinger unseren Vermietern geschenkt - die Aufgabe, den Rest zu vernichten, oblag dann mir. Nun gut, ich hätte mich ihr mit etwas weniger Enthusiasmus widmen können *hüstel* ...


Aber genug geredet: Hier kommt das Rezept.

Zutaten

Teig:
175 ml Milch
1/2 Würfel Hefe (21g)/1/2 Paket Trockenhefe
70g Zucker
380g Mehl
1 Ei
1 Msp. Kardamom

Füllung:
ca. 30 g Zucker
Zimt
75g gehackte Mandeln
30g Butter (oder nach Bedarf)

Guß:
Puderzucker
Milch
(Zimt nach Belieben)

50 ml Milch erwärmen. Hefe zerbröseln, mit der warmen Milch und 1 TL Zucker verrühren. Mehl in eine Schüssel geben, in die Mitte eine Vertiefung drücken und die Hefemilch hineingießen. Ein bisschen Mehl unterrühren und an einem warmen Ort abgedeckt ca. 20 Minuten gehen lassen. (Bei Trockenhefe entfällt dieser Schritt.)
Vorteig mit restlichen Zutaten zu einem glatten Teig verkneten oder bei Trockenhefe alle Zutaten verkneten. Weitere 30 Minuten gehen lassen und nochmal durchkneten. Auf einer bemehlten Arbeitsfläche zu einem Rechteck ausrollen.
In der Zwischenzeit die Mandeln karamellisieren: In einer nicht gefetteten, beschichteten Pfanne die Mandeln leicht rösten. Wenn sie beginnen, leicht nach Jahrmarkt zu riechen, den Herd ausschalten und den Zimtzucker unterrühren. Immer schön weiterrühren, bis der Zucker geschmolzen ist und die Mandeln davon überzogen sind.
Dann die Butter schmelzen und den Teig damit einpinseln. Hierauf werden nun die Mandeln sowie nach Wunsch mehr Zimtzucker verteilt. Von der breiten Seite her den Teig vorsichtig zu einer dicken Rolle ... rollen. Die Rolle in Scheiben schneiden und in eine eingefettete Backform setzen. (Man kann auch gut Muffinförmchen nehmen, wenn man die Schnecken lieber einzeln hat.) Die Schnecken noch einmal 20 Minuten gehen lassen. Im vorgeheizten Backofen (180°, Umluft 160°) 15-18 Minuten backen.
Noch warm mit dem Zuckerguss aus Puderzucker und Milch bestreichen/übergießen. Und dann genießen :o).


Dazu gibt es, passend zur Jahreszeit, Tee aus meiner süßen Rentiertasse (die ich aber auch schamlos den Rest des Jahres benutze).

Ich habe zum ersten Mal die Zimtschnecken, statt wie sonst einzeln auf dem Blech, in einer Springform gebacken und fand das Ergebnis sehr toll. Es ist so ein schönes Gefühl, den duftenden Teig auseinander zu ziehen - und die Glasur ist so auch einfacher. Auch das war übrigens ein erstes Mal und definitiv ein Hit (die Zimtschnecken meiner Mutter, so lecker sie auch waren, wurden recht schnell trocken). Wie man sieht, waren meine Schnecken sehr klein - die kann man natürlich auch größer machen. Kleine Schnecken sind aber einfach nur ein Vorwand, warum man zwei oder drei davon auf einmal essen kann.

Und solltet ihr tatsächlich keinen Zimt mögen: Man kann das Grundrezept ganz einfach abwandeln. Zum Beispiel mit Blaubeeren und Zitrone oder mit Kürbis und Apfel (okay, letzteres Rezept enthält auch Zimt, aber es soll ja auch nur ein Denkanstoß sein ;)).

***

At this time of the year I always feel like baking (wait ... only at this time?). And so I spent some time in the kitchen last Sunday, and because I wanted cinnamon rolls, I made cinnamon rolls - with a bit of a twist so they're not only the standard cinnamon rolls. And of course I want to share the results with you!

Somehow cinnamon rolls seem to be "in" right now ... At least I have seen them make an appearance on many blogs, both English and German. This makes me happy because cinnamon rolls are a happy memory for me - one of the few things my mother likes to bake (she's not much of a baker otherwise). I used a different recipe for the dough, though, but adjusted it to my taste - most importantly, some cardamom was needed since my mother actually got her recipe from an Astrid Lindgren book, and therefore cardamom gives the cinnamon rolls the real Swedish touch. At least in my opinion :). And then I wanted something more than "only" cinnamon and sugar, and I still had some chopped almonds ...

Full disclosure: The recipe for the dough is from a Weight Watchers book. But do not fear: You won't really lose weight with these ;). Especially not if you find, like I did, that M2 does not like cinnamon rolls. I gave half of them to our landlords - and then I tackled the task of eating the rest myself. A bit too enthusiastically, maybe *cough* ...


But I'm talking too much. Here's the recipe:

Ingredients

Dough:
175 ml milk
1/2 cube of yeast/1/2 package of dry active yeast
70g sugar
380g flour
1 egg
1 large pinch cardamom

Filling:
approx. 30g sugar
cinnamon
75g chopped almonds
30g butter (or more as you wish)

Glaze:
powdered sugar
milk
(cinnamon to taste)

Warm up 50 ml milk. Crumble the yeast into the milk and mix it with 1 teaspoon of sugar. Put the flour into a bowl and make a dent in the middle. Pour yeasty milk into the dent and mix it with some flour. Cover and let rest in a warm spot for approx. 20 minutes. (If you use active dry yeast, you can skip this step.)
Mix in the rest of the ingredients for the dough and knead well. Let rest for another 30 minutes, then knead again. Roll it out on a floured surface until you have a rectangle.
In the meantime caramelise the almonds. Roast them in a coated pan without oil until they begin to smell faintly burned. Turn off the stove and pour in the cinnamon and sugar. Keep stirring until the sugar has melted and the almonds are well-coated.
Melt the butter and brush the dough with it. Distribute the almonds more or less evenly on it (add more cinnamon and sugar if you like). Roll up the dough, starting from the longest side. Cut into thick slices and arrange in a baking pan. (You can also use cupcake liners in a muffin tin if you prefer individual small rolls.) Let rest another 20 minutes. In your preheated oven, bake at 180° (160° convection oven) for 15-18 minutes. Take out and while they are still warm, pour or brush the glaze made from powdered sugar and milk over them. And now ... enjoy ;o)!

In the spirit of the season, I enjoyed them with tea in my cute reindeer mug (which I also use shamelessly all year long).

I made the rolls in a baking pan for the first time instead of using a baking sheet as I normally do, and I really liked them that way. It's so nice to pull apart the lovely, soft dough - and the glaze is much easier this way, too. That was another first and definitely a hit (my mother's cinnamon rolls, as lovely as they are, got dry rather quickly). As you can see, my rolls were pretty small - but that's nothing but an excuse to eat two or three at once!

And if you actually don't like cinnamon: You can easily adjust the basic recipe with some other ingredients. For example with blueberries and lemon or with pumpkin and apple (okay, the second one has cinnamon, too, but just take it as inspiration and roll with it ;)).