Sonntag, 31. März 2013

[Looking back on ...] März 2013


Schon wieder ist ein Monat rum, und damit wird es Zeit für einen kleinen Instagram-Rückblick!

März war ein ruhiger Monat - das Wetter war weiterhin bescheiden (viel zu viel Schnee!), aber immerhin gab es ein paar schöne Tage zwischendurch. Man nimmt, was man kriegen kann. Anfang März habe ich mich mit meinen Eltern für ein paar nette Stunden in Stuttgart getroffen, und wir waren unter anderem auf dem Fernsehturm. Mitte März haben wir ein tolles Rollenspiel-Wochenende mit Freunden verbracht - im April geht es weiter, und ich freue mich jetzt schon drauf! Außerdem nahm ich zum ersten Mal an Post aus meiner Küche teil und habe mich wahnsinnig über das liebe Päckchen meiner Tauschpartnerin gefreut. Jetzt mache ich mir nur noch Sorgen um mein Päckchen, das ist nämlich noch nicht angekommen :(. Daher muss ein offizieller Eintrag darüber noch warten.

Wenn ihr mir folgen möchtet, findet ihr mich auf Instagram hier:

Again a month is over, and so it's time for a little look back on it with Instagram!

March was a quiet month - the weather continued to be bad (way too much snow!) but at least there were some nice days in-between. You take what you can get. At the beginning of March, I met my parents for a few nice hours in Stuttgart, and among others we visited the Stuttgart TV tower. In mid-March we had a great roleplaying weekend with friends - in April we will play again, and I'm already looking forward to it! I also took part in Post aus meiner Küche and was so happy with the cute package I got from my trade partner. Now I'm only worried about my package, it didn't arrive yet :(. Therefore I can't make an "official" post about it yet.

If you want to follow me, you can find me on Instagram here:


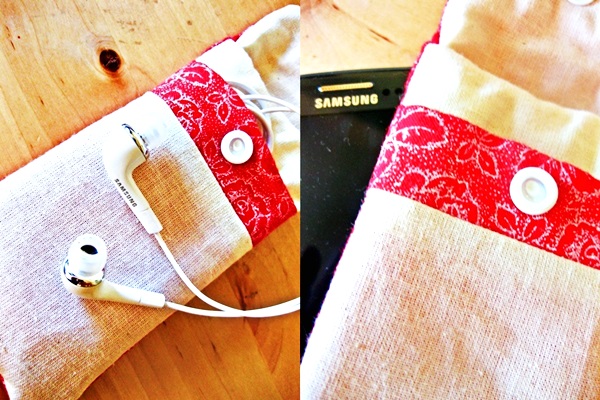
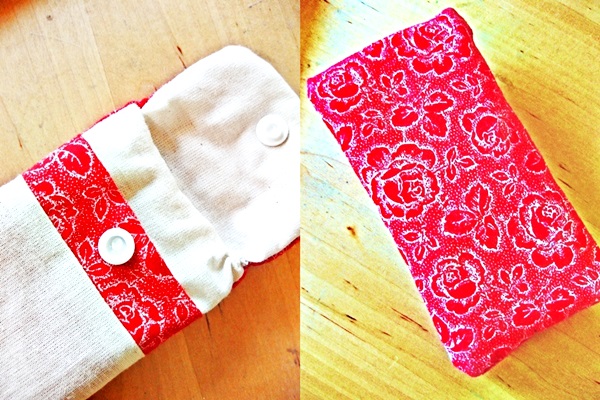
Ich brachte meiner Mama ihr Weihnachtsgeschenk mit - ein paar Kissenhüllen. / Wir besuchten gemeinsam den Stuttgarter Fernsehturm (wohl zum letzten Mal, er wird aus Brandschutzgründen für Besucher gesperrt). / Kleines Mitbringsel für meine Eltern, hübsch verpackt.

I brought my mom her Christmas present - a pair of pillow cases. / We visited the TV tower (probably for the last time, it will be closed to visitors for fire protection reasons). / Small present for my parents in pretty packaging.


Will jemand meinen Schnee haben? Ich mag ihn nicht mehr ... / Katzenspuren / Und es gibt sie doch noch!

Anyone here who wants my snow? I don't want it any more ... / Cat trail / The sun still exists!


Meine erste Post Aus Meiner Küche-Runde! Es wurde fleißig gebacken, verpackt und verschickt ... / ... und ich bekam ein superliebes Päckchen mit viel leckerem Inhalt! / Und auch sonst gab es leckere Sachen, nämlich Zitronen-Rosmarin-Scones.

My first time taking part in Post aus meiner Küche! Lots of baking and packing before sending it all off ... / ... and getting such a sweet package in return, with lots of tasty things! / And there were other tasty things, too, like lemon-rosemary scones.


Superleckere Schokolade! / Etwas Backen für Ostern. / Seht ihr, wo der Hase durch die Tür gesprungen ist? Entdeckt beim Osterspaziergang mit meiner Familie.

One of the tastiest chocolates ever! / Some baking for Easter. / Can you see where the Easter bunny broke through the door? Found while waking a walk with my family.

Ich hoffe sehr, dass der April etwas schöner wird, vor allem, was das Wetter angeht. Ich freue mich wie gesagt auf weitere Rollenspiel-Sessions, außerdem werde ich am Ende des Monats das erste Mal an einem Lauf teilnehmen und bin deswegen schon etwas nervös. Und ansonsten? Mal sehen, ich würde gern viel nähen, aber da ich meine Faulheit kenne, mache ich noch keine konkreten Pläne.

Und wie war euer März? Was steht im April so an?

I really hope that April will be nicer, especially with regard to the weather. As mentioned above, I'm looking forward to some more roleplaying; also, I will take part in a run at the end of the month for the first time and I'm somewhat nervous about that already. Other than that? We will see ... I'd like to sew a lot but since I know how lazy I am, I'm not making any plans so far.

And how was your March? Any plans for April?

Samstag, 30. März 2013

[Let them eat cake] Hefe-Osterhasen


Gerade noch pünktlich zum Osterfest wollte ich euch noch eine kleine Idee für den österlichen Brunch oder Kaffee zeigen. Diese kleinen Kerlchen gehen sehr schnell (wenn man von der Gehzeit des Hefeteigs absieht) und sehen einfach nett aus.

Das erste Mal gemacht habe ich sie vor zwei Jahren - damals entstanden auch noch welche, die dem Betrachter ihr Gesicht zeigten, aber mir gefiel die Rückseiten-Variante irgendwie viel besser. Also gibt es dieses Jahr Hasenpopos :p. Eigentlich wollte ich die Schwänzchen mit Hagelzucker verzieren, aber ich habe keinen bekommen :(. Die gehackten Mandeln waren aber auch lecker. Varianten, die ich mir auch noch vorstellen könnte, wären Schokoglasur oder bunte Streusel usw. Da kann man sich austoben ;).

Just in time for Easter I wanted to show you a little idea for your Easter brunch or coffee. These little guys are quick (apart from the time the yeast dough needs to rest) and are just cute.

I made them the first time two years ago - at that time, I also made some looking at the viewer but somehow I liked the backside variant much better. So here are some bunny bums this year :p. Originally I wanted to use decorating sugar for the tails but I didn't get any :(. But the chopped almonds were tasty, too. Other variants I could imagine would be painting the tails with chocolate or adding sprinkles, etc. Feel free to play around ;)!


Hefe-Osterhasen

Zutaten
200 ml Milch
1 Würfel Hefe
500 g Mehl
50 g Zucker
Salz
1 Ei
50 g weiche Butter
1 Ei (und ggf. etwas Milch) zum Bestreichen
Gehackte Mandeln, Hagelzucker o.ä. für die Schwänzchen

Milch nur lauwarm erwärmen. Hefe hineinbröckeln und unter Rühren auflösen.
Mehl, Zucker, eine Prise Salz und Ei in eine (große!) Schüssel geben. Hefemilch zugießen. Mit den Knethaken des Rührgeräts unterrühren. Butter in Flöckchen unterkneten, bis der Teig geschmeidig ist. Formt er sich zur Kugel, ca. 3 Minuten weiterkneten.
Abgedeckt an einem warmen Ort ca. 40 Minuten gehen lassen.
Nach dem Gehenlassen kurz durchkneten und in so viele Stücke aufteilen, wie es Hasen werden sollen. Ich habe sieben Hasen gemacht, die waren aber schon recht groß - man kann aus der Teigmenge bestimmt 10 - 12 Hasen machen. Man nimmt nun ein Teigstück und teilt es noch einmal auf. Ca. 2/3 werden der Körper, der Rest wird noch einmal unterteilt - noch einmal 2/3 werden der Kopf, aus dem Rest werden die Ohren und der Schwanz. Die Größen sind hier nur ungefähre Angaben; probiert einfach ein bisschen rum, bis die Aufteilung stimmt. Körper und Kopf werden zu Kugeln geformt und dann leicht plattgedrückt. Diese Kreise auf einem Backblech aneinander setzen - dabei vorher mit verschlagenem Ei einpinseln, damit sie besser halten. Die Ohren sind zwei rundliche Würste/Ovale, die ebenfalls mit Ei angeklebt werden. Eine kleine Kugel für das Schwänzchen formen und sie zuerst mit der Oberseite in das Ei und dann in Hagelzucker oder gehackte Mandeln tauchen. Mit Ei auf das Häschen kleben und den Rest auch noch bepinseln.
Bei 200°C im vorgeheizten Backofen ca. 15 Minuten backen lassen. Herausholen, abkühlen lassen und verschenken oder genießen!

Easter bunny buns

Ingredients
200 ml milk
1 cube of yeast
500 g flour
50 g sugar
salt
1 egg
50 g soft butter
1 egg (and maybe some milk) for brushing
Chopped almonds, decorating sugar or similar for the tails


Warm the milk until it's only lukewarm. Crumble the yeast into it and stir until dissolved.
Put flour, sugar, a pinch of salt and the egg in a (big!) bowl. Pour in the yeast milk. Mix with the dough hook of your hand mixer. Knead in the butter in small pieces until the dough is smooth. When it's forming into a ball, knead for another 2 minutes.
Leave to rest in a warm place for about 40 minutes, covered by a tea towel.
Give it a short knead after resting, then split in as much parts as you need. I made seven bunnies but they were on the large size - I think you could make up to 10-12 bunnies from the amount of dough. Now take a piece of dough and split it another time. Approx. 2/3 become the body, the rest is split again - another 2/3 become the head, the rest becomes the ears and the tail. The dimensions are just estimates here just try around for a bit until the proportions are right. Body and head are shaped to balls and then flattened slightly. Place on a baking sheet and attach the head to the body after brushing it with some beaten egg so it adheres better. The ears are formed into roundish pieces/ovals which are also attached with some egg. For the tail, form a little ball and dip it first into the egg and then into the decorating stuff of your choice. Attach to the bunny and brush the rest of the bunny with the egg, too.
Bake for approx. 15 minutes in the pre-heated oven at 200°C. Take out, let cool and either give away as a present or enjoy them yourself!

Fröhliche Ostern!

Happy Easter!

Mittwoch, 27. März 2013

[Let them eat cake] Zitronen-Rosmarin-Scones

Vor kurzem war bei uns mal wieder Rollenspiel angesagt - und das heißt natürlich, es wird auch wieder gebacken. Da ist es doch ausgesprochen praktisch, dass meine Freunde auf Facebook sehen können, was ich bei Pinterest pinne. So musste ich nicht lange überlegen - es gab die Zitronen-Rosmarin-Scones, die C. dort begeistert hatten.

Ich war vorher etwas nervös, denn es war tatsächlich das erste Mal, dass ich ein amerikanisches Rezept mit Cups-Angaben gebacken habe. Offenbar habe ich beim Umrechnen aber nichts gravierend falsch gemacht, denn das Ergebnis war wunderbar - locker und saftig, und die Kombination von Zitrone und Rosmarin war der absolute Hammer!

Some days ago, we met for roleplaying again - and of course that means baking time, too! It's very useful that my friends can see on Facebook what I'm pinning on Pinterest. So I didn't have to think for long - I made the lemon rosemary scones C. got very excited about on there.

I was a bit nervous before baking since this was actually the first time ever I made an American recipe with measurements in cups. But obviously I didn't do anything seriously wrong since they turned out wonderful - fluffy and moist, and the combination of lemon and rosemary is just awesome!


Zitronen-Rosmarin-Scones

Zutaten
400 g Mehl
130 g Zucker
1 Tütchen Backpulver
1/4 TL Salz
220 g Butter
1 großes Ei
240 ml Sahne
1 TL gehackte Rosmarinnadeln
Schale einer Zitrone

600 g Puderzucker
120 ml Milch
Schale und Saft einer Zitrone
1 TL gehackte Rosmarinnadeln
1 Prise Salz

Mehl, Backpulver, Zucker und Salz mischen und sieben. Die Sahne mit dem Ei, der Zitronenschale und dem Rosmarin vermischen und etwa eine Viertelstunde ziehen lassen.
Die Butter mit einem Pastry Cutter oder zwei Messern in die Mehlmischung einarbeiten. Wenn die Mischung krümelig ist, die Sahnemischung hinzugeben und mit einer Gabel vorsichtig unterrühren, bis es einen festen Teig ergibt. Sollte er zu krümelig sein, noch einen Schluck Sahne hinzugeben.
Zwischendurch den Ofen auf 180 Grad vorheizen.
Den Teig auf einer bemehlten Arbeitsfläche zu einem groben Rechteck zusammendrücken. Mit dem Nudelholz auf eine Dicke von ca. 1 cm ausrollen. Mit einem Messer zu einem halbwegs symmetrischen Rechteck zuschneiden und in 12 Rechtecke schneiden. Die Rechtecke dann halbieren, so dass es 24 Dreiecke ergibt.

Die Scones auf ein mit Backpapier ausgelegtes Backblech legen und in den Ofen schieben. Bei 180 Grad ca. 18 Minuten lang backen - aus dem Ofen nehmen, wenn sie beginnen, goldbraun zu werden. Abkühlen lassen.
Für die Glasur Puderzucker, Milch, Rosmarin und Zitronensaft und -schale verrühren. Die Scones vorsichtig in die Glasur tunken und auf einem Gitter abtropfen lassen, bis der Guss fest ist.

Originalrezept von The Pioneer Woman.


Lemon Rosemary Scones

Ingredients
400 g flour
130 g sugar
1 package baking powder
1/4 teaspoon salt
220 g butter
1 large egg
240 ml cream
1 teaspoon minced rosemary needles
zest of one lemon

600 g powdered sugar
120 ml milk
zest and juice of one lemon
1 teaspoon minced rosemary needles
1 pinch of salt

Sift flour, baking powder, sugar and salt together. Mix the egg, lemon zest and rosemary into the cream and let sit to steep for about quarter of an hour.
Cut the butter into the flour mixture using a pastry cutter or two knives until crumbs form. Add the cream and mix carefully with a fork until the dough forms. If the dough is too crumbly, add another splash of cream.
In the meantime, preheat the oven to 180 degree.
Press the dough into a rough rectangle on a floured surface. Use a rolling pin to roll it to a thickness of about 1 cm. Cut the edges to get a roughly symmetric rectangle and cut into 12 rectangles. Cut the rectangles in half so you get 24 triangles.
Place the scones on a baking sheet lined with parchment paper and bake for about 18 minutes at 180 degree. Remove when the scones start to turn golden and let cool.
For the glaze, mix powdered sugar, milk, rosemary and lemon juice and zest until the glaze is smooth. Carefully dunk the scones into the glaze and place on a wire rack to let the excess drip off until the glaze is set.

Original recipe by The Pioneer Woman.


Anmerkungen: Bei mir war der Teig überhaupt nicht krümelig, sondern eher feucht. Ich habe dann einfach beim Ausrollen noch einmal ordentlich Mehl untergeknetet, bis er nicht mehr geklebt hat. Darum habe ich die Mehlmenge bei den Zutaten gegenüber dem Originalrezept etwas erhöht - wenn der Teig trotzdem klebt, einfach Mehl unterkneten.
600 g Puderzucker fand ich extrem viel, darum habe ich nur etwa zwei Drittel genommen, gute 400 g. Das Tunken ging auch gut, allerdings hat der Zuckerguss sehr lange zum Trocknen gebraucht (zum Schluss habe ich die Scones einfach nach dem Abendessen, das auch aus dem Ofen kam, noch etwas in die Nachwärme geschoben). Also probiert es vielleicht doch mit der großen Portion Puderzucker!

Notes: My dough was not crumbly at all but rather wet. I simply kneaded a good deal of flour into it when I rolled it out until it wasn't sticky any more. Therefore I increased the amount of flour above slightly as compared to the original recipe - if the dough is still sticky, just knead in some flour.
I thought that 600 g powdered sugar is a ridiculously big amount, so I only used about two third of it, slightly more than 400 g. Dunking wasn't a problem but the glaze took very long to set (in the end, I simply put the scones into the still warm oven again after dinner for which I had used the oven, too). So maybe just go with this huge amount of powdered sugar!

Teller, Dip-Schälchen, Platte, Serviette/plate, dip bowl, platter, napkin: Butlers

Sonntag, 24. März 2013

[Artsy Me] Windsong

Gestern habe ich den ganzen Tag in der Küche verbracht und bin gewirbelt - es ist PAMK-Zeit! Also kann ich euch hoffentlich bald mit ganz vielen schönen Bildern von dem erfreuen, was ich fabriziert und bekommen habe :).

Aber bevor es damit losgeht - erst muss das Päckchen auch noch verschickt werden und ankommen -, gibt es heute ein einfaches Bild. Ich habe ja bereits in einem früheren Eintrag von dem Rollenspiel erzählt, in dem ich bin. Eines meiner Ziele für dieses Jahr ist, für möglichst viele von den Charakteren, die ich noch nie gezeichnet habe, zumindest ein Porträt zu zeichnen.

Yesterday I spent the whole day in the kitchen and baked up a storm - it's time for Post aus meiner Küche, a surprise food swap I'm taking part in for the first time! I hope I can show you lots of pretty pictures of the things I made and get soon :).

But before I can do it - first I have to send off the package and it has to arrive, too - today I want to show you a little picture I drew. I told you about a roleplaying game I'm in in an earlier post already. One of my goals for this year is drawing at least a simple portrait for as many of the characters I never drew before as possible.


Das ist Windsong, eine Jägerin und zweifache Mutter. Sie ist ein ruhiger, aber sehr verlässlicher und starker Charakter. Im Spiel hat sie gerade einige Veränderungen durchlaufen, da ihr Lebensgefährte mit einer anderen Frau ein Kind bekommen hat und ihre Beziehung deswegen gerade etwas in der Schwebe ist. Leider gab es zur selben Zeit auch "out of character" Veränderungen - ihre Spieler haben mehrfach gewechselt und oft nicht viel mit ihr gemacht, so dass vieles noch offen steht und sie nicht die Aufmerksamkeit bekommen hat, die sie verdient. Darum wollte wenigstens ich ihr etwas Aufmerksamkeit widmen.

This is Windsong, a huntress and mother of two. She is a calm but very reliable and strong character. In the game, she just went through some changes since her lifemate had a child with another woman and their relationship therefore is somewhat in limbo right now. Unfortunately there were some "out of character" changes at the same time, too - her players changed several times and often didn't do much with her so a lot is left open and she didn't get the attention she deserves. Therefore, I wanted to give her some attention myself, at least!

Coloriert ist das Bild einfach mit Buntstiften - Faber Castell Polychromos. Ich mag besonders, wie die Haare geworden sind.

I used colour pencils for the coloration - Faber Castell Polychromos. Especially the hair turned our well, I think!

Mittwoch, 20. März 2013

[Stich an Stich] Handytasche + Mini-Giveaway


Wie ihr ja anhand meines letzten "Looking back on ..."-Eintrags erfahren habt, habe ich seit kurzem ein Smartphone. Und natürlich braucht so ein schickes Teil eine schöne Hülle. So habe ich mich daran gemacht, ihm eine schöne kleine Tasche (vulgo: Handysocke) zu nähen.

As you might know from my latest "Looking back on ..." post, I now have a smartphone. And of course, such a sleek thing needs a pretty sleeve to protect it! So I sat down and sewed a nice little pouch for it.


Wie immer, wenn ich mir so etwas "Einfaches" vornehme, habe ich mir keinen Schnitt oder ein Tutorial gesucht, sondern versucht, es mir selber zusammenzureimen. Und wie meistens stellte sich heraus, dass das gar nicht so einfach ist ... Denn das Täschchen sollte gefüttert sein und natürlich alle Nähte innen liegen, ich wollte aber auch eine kleine Vordertasche für die Kopfhörer. Es hat mich etwas Knoten im Kopf gekostet, bis ich heraus hatte, wie ich das hinkriege, ohne dass am Ende die Vordertasche im Futter liegt oder Ähnliches (es wäre nicht das erste Mal ;)).

As always when I want to do something "simple", I did not look for a pattern or tutorial but tried to put it together myself. And like every so often, it turned out this wasn't so easy ... After all, it was supposed to have a lining so it's well protected but of course I wanted all seams to be covered, and I wanted a small pocket for my earphones. So I had to unravel my thoughts a lot until I knew how to do it without sewing the pocket into the lining or similar stuff (it's happened before ;)).


Letzten Endes hat es geklappt, und das Ergebnis gefällt mir gut. Ich habe auch zum ersten Mal Kam Snaps verwendet, was auch gut geklappt hat - im Nachhinein denke ich höchstens, vielleicht wäre ein dunkelroter Snap doch besser gewesen als ein weißer. Aber das sind Kleinigkeiten. So ein Täschchen ist auch schnell genäht, wenn man sich mal aufgerafft hat (meistens mein Hauptproblem ;)). Weiteren Verbesserungen steht also beim nächsten Täschchen sicher nichts im Wege.

In the end it all worked out, and I quite like the result. I also used Kam Snaps for the first time which also worked well - looking back, I only think that maybe a dark red snap would have been better than a white one. But those are just small things. Once you sit down and do it (which often is my main problem ;)), such a little pouch is quick to sew. That means the next time I can certainly improve on this one.


Aus gegebenem Anlass wird dies nämlich nicht mein letztes Täschchen bleiben. Aufmerksamen Betrachtern ist es vielleicht schon aufgefallen: Keines der Bilder zeigt das neue Smartphone in dem neuen Täschchen. Das Handy auf dem ersten Bild ist mein altes Nokia ...

Denn vor lauter Knoten im Kopf ist mir ein ganz doofer Fehler unterlaufen: Ich habe zu knapp gemessen bzw. nicht bedacht, wie sehr das Futter und die Nähte auftragen. Langer Rede kurzer Sinn: Das Täschchen ist zu klein geworden. Tja, da lässt sich nichts dran drehen.

For a certain reason, this will not be the last pouch I made. If you were attentive, you maybe noticed it already: None of the pictures shows the new smartphone in the new pouch. The mobile in the first picture is my old Nokia ...

The reason is that because of all that thoughts unraveling, I made a very stupid mistake: I cut the pieces too small or rather did not take into account how thick the lining and the seams get. Long story short: The pouch is too small. Nothing to be done about it.


Mein Missgeschick ist jedoch euer Gewinn. Denn ich habe beschlossen, dass ich das Täschchen nicht behalten, sondern lieber an jemanden weitergeben will, der sich hoffentlich darüber freut! Daher verlose ich es unter allen Lesern, die es gern haben möchten.

However, my bad luck is your fortune. I decided that I won't keep the pouch but would rather give it to someone who hopefully will enjoy using it! Therefore, I offer the chance to win it to all readers who would like to have it.

  • Wer also gern ein kleines, liebevoll gemachtes, wenn auch nicht perfektes Täschchen sein Eigen nennen will, hinterlässt mir einfach einen Kommentar unter diesem Eintrag. 
  • Das Giveaway läuft bis zum 31.3. um 24 Uhr.
  • Es wäre schön, wenn ihr Leser meines Blogs wärt, ob über GFC, RSS, Bloglovin oder Blog-Connect. Ihr könnt meinen Blog auch auf Facebook "liken". Es ist aber kein Ausschlusskriterium!
  • So, if you want to have a small pouch, made with love even if it isn't perfect, just leave a comment under this post!
  • The giveaway is open until 31 March, midnight (WET).
  • It would be nice if you followed my blog, whether via GFC, RSS, Bloglovin' or Blog-Connect or if you gave my blog a "like" on Facebook. However, it's not a must!
Noch zur Info: Das Täschchen hat die Maße von 13 x 7,5 cm. Wer ein kleines Handy hat, kann es sicher dafür verwenden, ich könnte mir aber auch gut vorstellen, dass ein iPod oder ein anderer MP3-Player auch gut hineinpassen würde.

Ich hoffe, es findet einen Liebhaber unter euch! Viel Glück :)!

For your information: The pouch measures 13 x 7.5 cm. If you have a small mobile, you can certainly use it for that but I can also imagine that an iPod or other MP3 player would also fit into it.

I hope it will find a new loving home! Good luck :)!

Materialien:
Bomull - Ikea
Roter Blumenstoff - Stoffladen (war ein Rest)
Bügelvlies - Stoffladen (Rest)
Kam Snap - Snaply Nähkram

Materials:
Bomull - Ikea
Red flower fabric - fabric store (scraps)
Iron-on interface - fabric store (scraps)
Kam Snap - Snaply Nähkram

Sonntag, 10. März 2013

[Let them eat cake] Upside-Down-Buchteln


Letzte Woche habe ich mir noch einmal was aus der Lecker Bakery ausgesucht - wir hatten noch einen Hefewürfel, der verbraucht werden musste. Unsere Wahl fiel auf die Upside-Down-Buchteln.

Und da ich mich am Wochenende mit meinen Eltern getroffen habe und ihnen ein paar davon mitbringen wollte, habe ich eine Tüte aus braunem Packpapier gebastelt und sie mit Washi-Tape verziert. Sie wurde ganz süß, und so habe ich sie gleich als Prop für den Foto-Shoot benutzt ;).

Die Buchteln sind sehr lecker - am besten sind sie natürlich, wenn sie frisch aus dem Backofen kommen! Und auch wenn ihre Herstellung für mich eine kleine Katastrophe nach der anderen darstellte (was nicht am tollen Rezept lag, sondern nur an meiner Schusseligkeit!), sind sie mir doch gut gelungen. Die Herstellung des Hefeteigs nach der Lecker-Anleitung war für mich etwas ungewohnt, er ist aber wirklich gut geworden.

Last week I tried another recipe from the Lecker Bakery - we still had a cube of yeast we needed to use, so we decided on the upside-down buchteln. Buchteln are an Austrian pastry, a kind of baked yeast bun usually eaten with custard or jam. Here, they are baked with a glaze of caramellised nuts.

And since I met my parents last weekend and wanted to bring them some of them, I made a bag from kraft paper and decorated it with washi tape. It turned out quite cute, and so I used it as a prop for the photo shoot ;).

The buchteln are very good - of course they are best just after baking! And even though I had one little catastrophe after the other when making them (which was not the fault of the great recipe but only my own ditziness!) they turned out great. Making the yeast dough according to the Lecker instructions was a bit unusual for me but it turned out really good. 


Upside-Down-Buchteln

Zutaten
200 ml Milch
1 Würfel Hefe
500 g Mehl
50 g Zucker
Salz
1 Ei
50 g weiche Butter
100 g Nüsse (z.B. Haselnüsse und Walnüsse)
150 g Zucker
100 g Schlagsahne
50 g Butter

Milch nur lauwarm erwärmen. Hefe hineinbröckeln und unter Rühren auflösen.
Mehl, Zucker, eine Prise Salz und Ei in eine (große!) Schüssel geben. Hefemilch zugießen. Mit den Knethaken des Rührgeräts unterrühren. Butter in Flöckchen unterkneten, bis der Teig geschmeidig ist. Formt er sich zur Kugel, ca. 3 Minuten weiterkneten.
Abgedeckt an einem warmen Ort ca. 40 Minuten gehen lassen.
Haselnüsse und Walnüsse grob hacken. In einer Tarte-Tatin-Form oder Pfanne ohne Fett rösten und herausnehmen. 150 g Zucker und 2 EL Wasser in der Form hell karamellisieren. Mit Sahne ablöschen, 50 g Butter unterrühren. Köcheln lassen, bis der Zucker vollständig gelöst ist. Nüsse unterrühren. Ohne Tarte-Tatin-Form das Karamell in eine Springform oder große, flache Auflaufform füllen.
Teig auf einer bemehlten Arbeitsfläche kurz durchkneten. Zu einer Rolle (5-6 cm Durchmesser) formen. In ca. 15 gleich große Stücke teilen, je zu einer Kugel formen. Dicht an dicht auf die Karamellnüsse setzen. Zugedeckt ca. 30 Minuten gehen lassen.
Backofen auf 200°C vorheizen. Buchteln ca. 20 Minuten backen. Erst ca. 15 Minuten in der Form abkühlen lassen und dann auf eine Platte stürzen. Restlichen Karamell aus der Form auf die Buchteln geben.


Upside-Down-Buchteln (sweet yeast dumplings)

Ingredients
200 ml milk
1 cube of yeast
500 g flour
50 g sugar
salt
1 egg
50 g soft butter
100 g nuts (e.g. hazel nuts and walnuts)
150 g sugar
100 g cream
50 g butter

Warm the milk until it's only lukewarm. Crumble the yeast into it and stir until dissolved.
Put flour, sugar, a pinch of salt and the egg in a (big!) bowl. Pour in the yeast milk. Mix with the dough hook of your hand mixer. Knead in the butter in small pieces until the dough is smooth. When it's forming into a ball, knead for another 2 minutes.
Leave to rest in a warm place for about 40 minutes, covered by a tea towel.
Chop the nuts roughly. Roast without fat in a tarte tatin or pan and remove. Lightly caramelize 150 g sugar and 2 table spoons of water. Deglaze with the cream and mix in the 50 g butter. Let boil lightly until the sugar has dissolved completely. Stir in the nuts. If you don't have a tarte tatin, fill the caramel into a springform pan or big flat casserole.
Knead the dough a bit on a floured surface. Shape into a roll (with a diameter of 5-6 cm). Divide into approx. 15 pieces of the same size and form into balls. Put on the caramel nuts close together. Let rest for about 30 minutes, covered by a tea towel.
Heat the oven to 200°C. Bake the buchteln for about 20 minutes. Leave to cool in the form for about 15 minutes first, then turn out on a plate. If there is caramel left in the form, pour it on top.

Dienstag, 5. März 2013

[Artsy Me] Thornbow Tarot


In einem meiner Rollenspiele arbeite ich seit einiger Zeit an einem Projekt: Eine Reihe von Tarotkarten mit den Charakteren aus dem Spiel. Ich will dabei die ganze Große Arkana sowie die Hofkarten der Kleinen Arkana umsetzen - 38 Karten insgesamt, es ist also ein echtes Mammutprojekt! Ich bin gespannt, ob ich das Ende noch erlebe :).

Dies ist Thornbow als der Ritter der Münzen.

In one of my roleplaying games I've been working on a project for some time: A series of tarot cards with the characters from the game. I want to illustrate the whole Major Arcana as well as the Court cards of the Minor Arcana - 38 cards in total, so it's a real mammoth project! I'm wondering if I will live to see it finished ;).

This is Thornbow as the Knight of Pentacles.


Der Ritter der Münzen ist ein sehr bodenständiger, hart arbeitender Charakter, vielleicht nicht besonders kreativ, aber sehr verlässlich und mit einem gewissen Perfektionismus.

Ich bin hierbei ein bisschen von der Bildersprache des Rider-Whaite abgewichen, nachdem ich bereits zwei Ritter mit dem reitenden Motiv gemacht habe, und habe mich stattdessen von einer anderen Tarot-Version inspirieren lassen. Um das Münz-Symbol besser in die Welt des Rollenspiels einzuarbeiten, wurde daraus ein Schild.

Ich bin recht zufrieden mit der Coloration - das Gute an Aquarell ist, dass ich dort bei fast jedem Bild eine gewisse Verbesserung sehe (im Gegensatz zu Buntstift, mit denen erziele ich zwar gute, solide Ergebnisse, aber ich sehe nicht viel Entwicklung). Am besten ist mir diesmal die Schattierung im Gesicht gelungen, finde ich.

The Knight of Pentacles is a very down-to-earth, hard-working character, very reliable but maybe not the most creative and with a certain degree of perfectionism.

I here deviated a bit from the imagery of the Rider-Whaite since I already did two Knights with the riding motif, and let myself inspire from another tarot version instead. In order to make the pentacle fit better into the world of the roleplaying game, I turned it into a shield.

I'm quite happy with the colouring - the good thing about water colours is that I can see some sort of improvement in almost every picture (contrary to colour pencils, with which I get good, solid results but don't see much development). I think the shading in the face turned out best this time.

Wenn ihr euch für die anderen Karten interessiert, die ich bisher schon gemalt habe, findet ihr sie hier.

If you are interested in the other cards I painted so far, you can see them here.