Sonntag, 30. Dezember 2012

Weihnachtskleid-Sew-Along Teil 6: Weihnachtskleider in Aktion

Tja, Weihnachten ist vorbei! Aber etwas steht noch aus. Nämlich:

30.12.2012
Weihnachtskleid-Sew-Along Teil 6: Weihnachtskleider in Aktion
Finale der Herzen, für alle die es nicht bis zum 23. geschafft haben. / Ich im Weihnachtskleid mit Baum.

Leider musste ich einige Einträge zum Sew-Along ausfallen lassen, aus Mangel an Zeit und Fotos. Aber wenigstens zum Abschluss will ich dabei sein! Und so präsentiere ich euch ohne (allzu viele) Umschweife meinen Weihnachtsrock 2012.

So, Chrismas is over! But there's still something left to do. Namely, this:

30/12/12
Christmas Dress Sew Along, part 6: Christmas Dresses in action
Final of hearts for everyone who didn't finish until the 23. / Me in my Christmas dress and the tree.

Unfortunately, I had to skip a few posts for the Sew Along because of a lack of time and pictures. But at least in the finale I want to be there! And so, without (too) much ado, I present my Christmas skirt 2012.


Ich muss leider gestehen, dass ich nicht hundertprozentig zufrieden mit dem Rock bin. Der Jerseysaum will an einigen Stellen nicht glatt liegen, und vor allem habe ich festgestellt, dass der Rock durch die enge Form zwar schön die Beine betont - leider aber auch etwas anderes, nämlich meine absolute Problemzone, meinen dicken Bauch. Daher werde ich auch niemals die Fotos in Seitenansicht zeigen ...

Ich bin aber trotzdem froh, dass ich ihn genäht habe. Schön ist er auf alle Fälle, er wird sich wohl nur eher nicht zum Lieblingsstück entwickeln. Und ich konnte ein lange geplantes Projekt von meiner Liste streichen, das ist auch was wert.

Insgesamt hat mir der Sew-Along Spaß gemacht, auch wenn es teilweise etwas hopplahopp und stressig war. Hoffentlich gibt es im nächsten Jahr wieder einen, an dem ich dann mit etwas mehr Zeit und Muße teilnehmen kann! Und durch die vielen schönen Bilder habe ich richtig Lust bekommen, mir im nächsten Jahr mal zur Abwechslung ein paar Kleider zu nähen.

Mehr Fotos unterm Weihnachtsbaum gibt es hier bei Katharina.

Und zuletzt gibt es noch ein Bild von unserem "Weihnachtsbaum" ;).

I have to admit, sadly, that I'm not totally happy with the skirt. The Jersey hem does not want to stay flat in some parts, and most of all, I had to notice that while the tight fit makes nice legs, it also emphasizes something else - that is, my absolute problem area, my big belly. Therefore, I'll never show anyone the pictures showing me from the side ...

Nevertheless, I'm happy I've done it. The skirt is pretty in any case, it just won't become one of my favourites. And I could strike a project planned for a long time from my list, that's also something good.

Overall, I enjoyed the Sew Along even if it was somewhat improvised and stressful in parts. Hopefully, there will be one again next year in which I can take part with some more time and leisure. And thanks to the many beautiful pictures, I really feel like sewing some dresses next year for a change.

For more pictures under the Christmas tree, hop over to Katharina.

And finally, here's a picture of our "Christmas tree" ;).


Freitag, 28. Dezember 2012

Wichtelbild für Linda

Nachdem ich Weihnachten überstanden habe (es war schön, aber auch anstrengend - allerdings eher die Vorweihnachtszeit als das Fest selbst, das war sehr kuschelig und schön), kommt hier mal was anderes als "immer nur" Genähtes und Gebackenes. Endlich habe ich auch mal wieder gezeichnet.

In einer meiner Rollenspielgruppen (auch als Hain oder Holt bezeichnet), in der es sich um das Leben eines Elfenstammes dreht, machen wir seit ein paar Jahren jedes Jahr zu Weihnachten eine Wichtel-Aktion - oder auf Englisch: Secret Santa. Dabei geht es nicht um materielle Geschenke, sondern verschenkt werden Bilder und Geschichten. Das liebe ich sehr, denn man bekommt dabei wunderschöne Kunstwerke und vor allem Zeit und Aufmerksamkeit. Es steckt viel Liebe in so einem Bild oder einer Geschichte :).

Dies hier ist mein Wichtelgeschenk:

After we survived Christmas (it was great but also exhausting - though that was the time before rather than the holidays themselves which were very cosy and nice), here's something different than "always" something I sewed or baked. I finally drew something again.

In one of my roleplaying groups (also called a holt) about the life of an elfin tribe, we have had a Secret Santa for a few years. It's not about material presents but you draw a picture or write a story for your secret santa partner. I really love it because you get great art out of it but most importantly, you get the time and attention of your partner. There is a lot of love in such a picture or story :).

This is my present in this year's round:


Es zeigt die Charaktere meiner Wichtelpartnerin Linda: Newshine (oben links), Snowbird (oben rechts) und Gentlepeace (Mitte). Drei sehr unterschiedliche Elfen, sowohl vom Aussehen als auch vom Charakter her!

Coloriert ist es mit Buntstift. Da die Elfen hoch oben in den Bergen leben, habe ich die Holz/Ast-Umrandung, die ich gerne verwende, mit etwas Schnee verziert. Mein persönlicher Favorit von den dreien ist Newshine, wo mir der Gesichtsausdruck, meiner bescheidenen Meinung nach, am besten gelungen ist.

Selbst habe ich eine sehr schöne Kurzgeschichte bekommen!

It shows the characters of my Secret Santa partner Linda: Newshine (upper left), Snowbird (upper right) and Gentlepeace (centre). Three very different elves, both in appearance and in character!

I coloured it with coloured pencils. Since the elves are living high in the mountains, I decorated the wood/branch frame I like to use with some snow. My personal favourite of the three is Newshine as I think her expression is the best, IMHO.

I got a lovely short story myself!

Sonntag, 23. Dezember 2012

DIY: Geschenkgutschein-Hülle

Morgen ist es schon so weit! Ich habe heute noch die letzten Vorbereitungen abgeschlossen und bin ganz froh, dass einiges noch geklappt hat. Unter anderem wurde mein Weihnachtskleid-Sew-Along-Rock fertig - davon gibt es aber noch keine Bilder, also wird das nach Weihnachten nachgeholt.

Unter anderem entstand heute noch schnell diese kleine Geschenkgutschein-Hülle. Ich finde die Idee ganz witzig und bin froh, dass es halbwegs so geklappt hat, wie ich mir das vorgestellt habe.

Tomorrow the wait is over! Today I finished my last preparations and I'm pretty happy that some things worked out in the end. Among others, I finished my Christmas Dress Sew-Along skirt - I couldn't take pictures yet, though, so I'll catch up on that after Christmas.

Among others, I made this little gift certificate sleeve today. I think the idea is quite funny and I'm happy it turned out more or less as I imagined it.


Man braucht:
* einen Reißverschluss (beliebige Länge - ich habe den kürzesten genommen, den ich hatte)
* Tonkarton
* einen Gutschein
* nach Wunsch Verzierungen (ich habe die Hülle schlicht gehalten, aber man kann sich sicher mit Washi-Tape und Stempeln usw. daran austoben, wenn man möchte)

Zuerst habe ich den Karton für Rück- und Vorderseite zugeschnitten. Dazu habe ich einfach eine Weihnachtskarte als Vorlage genommen, damit die Größe etwa hinkommt.

Anschließend habe ich auf dem Karton für die Vorderseite den Reißverschluss etwa so drapiert, wie ich mir die Öffnung der Hülle vorgestellt habe. Den Verlauf habe ich grob auf dem Karton aufgezeichnet und ihn dann dementsprechend zugeschnitten. Dadurch bekam ich zwei Teile, einmal für links und einmal für rechts. Der dritte Teil, wo die Öffnung sein sollte, ist überflüssig und kommt weg.

You'll need:
* a zipper (of any length - I took the shortest I had)
* construction paper
* a gift certificate
* decorations, if you want (I kept the sleeve simple but you could go nuts with washi tape and stamps if you like)

First, I cut the paper for the back and front. I simply traced it with another Christmas card to make sure it was the right size.

Then I placed the zipper on it like I wanted the opening to look like and marked the course of the zipper with pencil, cutting it out along the lines. You now have two parts, one for the left and one for the right side. The third part we won't need any more - that's where the opening will be.


Mit der Nähmaschine wird nun der Reißverschluss an die beiden Stücke der Vorderseite angenäht und dann das Ganze auf der Rückseite festgenäht. Überstehende Stücke abschneiden, den Gutschein in die Hülle schieben - et voilà!

Now you sew the zipper to the two parts of the front with the sewing machine and then sew the whole thing to the back. Cut off everything protruding at the edges and insert your gift certificate in the sleeve - voilà!


Ich finde die Idee besonders witzig für Gutscheine für etwas Genähtes, wie hier :). (Keine Sorge, die Beschenkte weiß ohnehin, was sie bekommt - aber es ist auch extrem unwahrscheinlich, dass sie sich hierher verirrt *g*.)

Wollt ihr noch einen kleinen Blick darauf werfen, wie meine Geschenke dieses Jahr sonst so aussehen?

I think the idea is quite cute especially for gift certificates for something sewn by you, like this one :). (Don't worry, the person who gets this knows what she gets anyway - but it's extremely unlikely she'll find this, too *grin*.)

Do you want to have a look what my other presents look like this year?


Dieses Jahr habe ich es mit Packpapier schlicht gehalten und dafür lieber mehr verziert, mit Washi-Tape, Tannenzweigen und süßen Tags.

Und dazu gibt es noch Plätzchen-Tüten.

This year, I kept it simple with kraft paper and rather went for decoration with washi tape, fir twigs and cute tags.

Also, there are Christmas Cookies for everyone.


Ich wünsche euch allen fröhliche Weihnachten! Feiert schön und genießt die gemütlichen freien Tage mit euren Lieben!

Have a wonderful Christmas, everyone! Have fun and enjoy the cosy free time with your loved ones!

Washi Tape: Blueboxtree
Geschenkband: Rossmann
Tags: Freebie von theinspiredroom.net

Dienstag, 18. Dezember 2012

Log Cabin-Gästeschlappen


Oh je, letzte Woche war ich faul beim Bloggen - nun ja, es ist kurz vor Weihnachten, das kennt ihr sicher alle. Nicht mal am Weihnachtsrock für den Sew-Along konnte ich weiterarbeiten, daher gab es dazu am Sonntag auch keinen Eintrag.

Diese Gästeschlappen habe ich vorletzte Woche (glaube ich) endlich fertig gestellt. Es finden sich regelmäßig zwei gute Freunde zum Rollenspiel hier ein, und nachdem ich M2 schon ein Paar Schlappen genäht hatte, lag die Idee nah, auch für unsere Freunde Gästeschlappen zu nähen. Dies ist also das erste Paar. Genäht sind sie nach einem Muster von Ayumi.

Sie wurden übrigens im halbfertigen Zustand hier schon einmal gezeigt/erwähnt.

Oh-oh, last week I was a lazy blogger - but oh well, Christmas is right around the corner, so I'm sure you all know how it is. I didn't even continue working on the Christmas skirt for the sew-along, so there was no post about that on Sunday either.

I finally finished these guest slippers the week before last (I think). Two good friends are regularly our guests for some roleplaying, and after I already sewed a pair of slippers for M2, it wasn't a big leap to decide to make guest slippers for our friends as well. So this is the first pair. I used a pattern by Ayumi.

I had shown/mentioned them already once in this post.


Auf die Frage nach der Lieblingsfarbe oder einem gewünschten Muster bekam ich nur eine Antwort: Bunt sollen sie sein. Okay, dachte ich mir, bunt kann ich. Also wurden die kräftigsten Uni-Farben herausgesucht, die ich hatte, und es gab ein ganz schlichtes, aber sehr buntes Log Cabin in den Grundfarben (und Grün, ich weiß, dass das eigentlich keine Grundfarbe ist ^^). Etwas Muster bringt noch das Schrägband mit Karos rein, das ich übrigens selber gemacht habe - ohne Schrägbandformer. Direkt danach bin ich losgezogen und habe einen Schrägbandformer gekauft.

When I asked for her favourite colour or a pattern she would like, the only answer I got was: Colourful! Okay, I thought, I can do colourful. So I took the brightest solids I had and made a very simple but very colourful log cabin in primary colours (and green, I know that's not a primary colour ^^). The checkered bias tape adds a bit of a pattern. I made it myself, by the way - without a bias tape maker. Directly afterwards I went and bought a bias tape maker.


Die Entscheidung, Schrägband zu verwenden, war eine der besten, die ich treffen konnte. Bei den Schlappen für M2 war das Binding ungleich mehr Arbeit (in dem Muster war das Binding aus einem gerade geschnittenen einfachen Streifen).

Keine so gute Entscheidung war der rote Stoff. Der war nämlich stretchig, und das ist bei Patchwork ganz schlecht. Würde ich nicht noch einmal machen, aber das Endergebnis ist ja noch gut geworden. Nur leider sind sie etwas knapp bemessen. Ihre neue Eigentümerin hat sich trotzdem gefreut.

Jetzt fehlt mir nur noch eine gute Idee für Muster und Farben für den anderen Freund - der sagt zwar, er braucht keine Schlappen, aber soll mich das etwa aufhalten ;)?

The decision to use bias tape was one of the best I could make. When I made the slippers for M2, the binding was much, much more work (the pattern called for a binding cut from a straight strip of fabric).

The red fabric, however, wasn't such a good decision. This one was stretchy, you know, and that's very bad for patchwork. I wouldn't use it again but the end product turned out fine after all. They're only a bit on the small side. Her new owner was happy with them anyway, though.

Now I only need a good idea for pattern and colours for our other friend - though he's saying he doesn't need slippers. But does that have to stop me ;)?

Dienstag, 11. Dezember 2012

Mittens Before Midnight


Ich bin eigentlich ein Warmblut und friere selten - selbst im Winter trage ich mehr T-Shirts als langärmlige Oberteile. Seit ich aber etwas abgenommen habe, kriege ich oft kalte Hände ... Daher habe ich meine Leidenschaft für Pulswärmer und fingerlose Handschuhe entdeckt, besonders, wenn ich bei der Arbeit am Computer sitze. Außerdem macht es Spaß, sie zu stricken, und sie gehen schnell.

... Wenn man sie nicht fast fertig in der Sockenschublade (!) vergisst. Angefangen hatte ich dieses Paar nämlich Ende März. Dieser Tage habe ich mich aber mal daran erinnert und sie fertig gemacht.

Das Muster ist Mittens before Midnight - ich fand es in echt leider nicht ganz so schön wie auf den Fotos. Das nächste Mal werde ich wahrscheinlich wieder ein Zopfmuster machen.

Leider ist es echt schwer, bei den derzeitigen Lichtverhältnissen gute Fotos zu machen. Von den Fotos, die M2 von mir gemacht hat, war das obige das einzige, das etwas geworden ist :(.

Usually, I'm a very warm-blooded person and am rarely cold - even in winter, I rather wear T-shirts than something with long sleeves. But since I lost some weight, my hands are often cold ... Therefore I discovered my love for fingerless gloves/mittens, especially when sitting at the computer during work. And it's fun knitting them, and they're fast.

... Unless you forget them in your sock drawer (!) though they are almost finished. I started this pair at the end of March. But a few days back I remembered them and finished them.

The pattern is Mittens before Midnight - unfortunately I didn't like the pattern as much in reality as on the pictures in the pattern. Next time I'll do cabling again, I think.

Unfortunately, with the current light it's hard to take good pictures. The one above is the only one of all the pictures M2 made of me that turned out nice :(.


Als Bonus gibt es heute noch ein Foto meines nächsten Häkelwindlichts - ich habe noch ein Glas zum Umhäkeln gefunden. Da es dazu ja erst vor kurzem einen Blog gab, erhält es jetzt keinen eigenen Eintrag ;).

Dieses Mal habe ich eine Reihe dreifacher Stäbchen mit eingearbeitet und habe ein hübsches Geschenkband hindurchgezogen und zu einer Schleife gebunden. Leider war das Band breiter, als ich gedacht hatte, so dass ich es doppelt nehmen musste, aber es stört nicht weiter. Ich finde die Schleife sehr süß :).

As a bonus, here are some pictures of my next crocheted tea candle holder - I found another glass I could make a sleeve for. Since I just wrote about them on the blog, it doesn't get its own post ;).

This time I did a row of treble crochet stitches and then weaved a nice ribbon through it, finishing it off with a bow. The ribbon was wider than I thought so I had to fold it in half but it doesn't really matter anyway. I think the bow is very cute :).


Wusstet ihr, dass es auf Flickr eine ganze Gruppe gibt, die sich nur Häkelwindlichtern widmet? Es gibt nichts, was es nicht gibt ...

Did you know there is a whole group on Flickr that's all about crocheted tea candle holders? There's nothing that doesn't exist, I guess ...

Sonntag, 9. Dezember 2012

Weihnachtskleid-Sew-Along, Teil 3

Puh, dieses Wochenende bin ich mit dem Nähen ganz schön in Stress gekommen. Heute fahre ich in die Stadt, in der ich Anfang dieses Jahres noch gewohnt habe - es steht die Weihnachtsfeier unserer Firma an. Dafür nehme ich einen ziemlich langen Anfahrtsweg in Kauf, aber gerade als Mitarbeiter im Home Office musst du ja dafür sorgen, dass der Chef dein Gesicht noch kennt ;). Und die Kollegen wieder treffen ist natürlich auch schön.

Aber so fehlt mir eben gefühlt ein großes Stück Wochenende, und darum wurde der Samstag leicht stressig ... Trotzdem habe ich es aber geschafft, am Weihnachtskleid-Sew-Along weiterzuarbeiten. Und somit ist hier der Check-in:

Phew, this weekend I became a bit stressed with sewing. Today I will travel to the town that had been my home until the beginning of this year - my company's Christmas party will find place in the evening. I travel quite a distance for it but especially when working in home office, you need to make sure that your boss still remembers your face ;). And it's nice to see the colleagues again, too.

But it means I have the feeling that I'm lacking a big part of my weekend, and Saturday was a bit stressful. Nevertheless, I managed to work on the Christmas dress sew-along. Therefore, here's the check-in:

9.12.2012
Weihnachtskleid-Sew-Along Teil 3: Ich nähe, also bin ich.
Es wird, Geduld, es wird... / Ich bin fast fertig, nur noch die Knöpfe. / Hilfe, da stimmt was nicht!

9/12/12
Christmas dress sew-along, part 3: I sew, ergo sum (sorry, I don't really know Latin :p)
Getting there, be patient, I'm getting there .../I'm almost finished, just the buttons to go./Help, something's wrong here!

Gestern Mittag ging es erst einmal ans Zuschneiden. Ich stellte fest: Meine Stoffplanung ist perfekt. Nicht ein Zentimeter zu viel Stoff ... Seht selbst!

So yesterday I started cutting first and discovered: My fabric calculations are perfect. Not a single centimeter too much fabric ... See for yourself!


Das Zuschneiden ging auch noch problemlos - dann wurde erst mal gesteckt und anprobiert. Und ich muss sagen: Jersey und ich werden wohl keine Freunde. Als Erstes verabschiedeten sich nämlich erst mal die Hälfte der Stecknadeln ... Daraufhin beschloss ich, lieber auf Nummer Sicher zu gehen. Nachdem ich erst mal die Mittelteile etwas schmaler gemacht hatte - es war noch etwas weit -, griff ich zu Nadel und Faden. Ich hefte zwar sehr ungern, aber so viel mehr Spaß macht Stecken jetzt auch nicht, und so weiß ich wenigstens, dass alles da bleibt, wo es hingehört (und nicht in meinem Bein steckt).

Cutting was really easy - and then I started pinning and trying on. And I have to say: I don't think Jersey and I will be friends. The first thing that left me was half of the pins ... So I decided to play it safe. After first taking away some width from the middle parts - it was still somewhat loose - I took needle and thread. I don't really like basting but pinning isn't that much more fun, and at least now I know that everything stays where it's supposed to (and won't get stuck in my leg).


Dann anprobiert - ja, passt -, und dann wurde genäht. Wenigstens beim Nähen hat der Jersey nicht gezickt ... Und somit sieht der derzeitige Stand so aus (sorry, schlechtes Foto):

Trying it on one more time - yep, that works - and then I could start sewing. At least sewing the jersey was no problem. So the current state looks like this (sorry for the bad picture):


Was noch zu tun bleibt:
  • Abnäher an der Hüfte setzen
  • Lösung für den Bund überlegen (er sitzt etwas zu tief, als dass ich ihn einfach nur umnähen könnte)
  • Kürzen (etwas zu lang geworden)
  • Säumen
Das sollte doch in zwei Wochen zu schaffen sein, oder?

Still to do:
  • Darts at the hips
  • Think of a solution for the waistband (it is sitting a bit too low for a simple seam)
  • Shortening (it's a bit too long)
  • Seaming
That should be doable in two weeks, right?

Und wie weit seid ihr?

Viele weitere fleißige Näherinnen findet ihr hier.

And how far have you got?

You can see many more busy sew-along bees here.

Dienstag, 4. Dezember 2012

[Let them eat cake] Zimtschnecken mit karamellisierten Mandeln

Zu dieser Jahreszeit steht mir immer der Sinn nach Backen (Moment, nur in dieser Jahreszeit?). Und so habe ich mich letzten Sonntag in die Küche gestellt und weil ich Lust auf Zimtschnecken hatte, habe ich mein Standard-Zimtschneckenrezept etwas abgewandelt. Das Endergebnis will ich euch nicht vorenthalten!


Zimtschnecken sind ja gerade irgendwie voll in ... Zumindest habe ich sie in den letzten Wochen auf vielen Blogs auftauchen sehen, sowohl englischen als auch deutschen. Das freut mich, denn Zimtschnecken sind für mich eine wunderbare Erinnerung - eine der wenigen Sachen, die meine Mutter gern und gut backt (sie hat es sonst nicht so mit dem Backen). Ich habe diesmal allerdings ein anderes Teigrezept genommen und dieses noch etwas angepasst - vor allem musste eine Messerspitze Kardamom in den Teig, denn meine Mutter hat ihr Rezept tatsächlich aus einem Astrid Lindgren-Buch, und daher gibt Kardamom den Zimtschnecken den richtig schwedischen Touch. Zumindest in meinen Augen :). Und dann wollte ich noch etwas mehr Füllung als "nur" Zimtzucker und hatte da noch so ein paar gehackte Mandeln ...

Im Interesse der Offenheit verrate ich euch, dass das Teigrezept aus einem Weight Watchers-Backbuch stammt. Aber keine Angst, man kann mit diesen Dingern nicht wirklich abnehmen ;). Vor allem nicht, wenn man wie ich feststellen muss, dass M2 keine Zimtschnecken mag. Also habe ich die Hälfte der leckeren Dinger unseren Vermietern geschenkt - die Aufgabe, den Rest zu vernichten, oblag dann mir. Nun gut, ich hätte mich ihr mit etwas weniger Enthusiasmus widmen können *hüstel* ...


Aber genug geredet: Hier kommt das Rezept.

Zutaten

Teig:
175 ml Milch
1/2 Würfel Hefe (21g)/1/2 Paket Trockenhefe
70g Zucker
380g Mehl
1 Ei
1 Msp. Kardamom

Füllung:
ca. 30 g Zucker
Zimt
75g gehackte Mandeln
30g Butter (oder nach Bedarf)

Guß:
Puderzucker
Milch
(Zimt nach Belieben)

50 ml Milch erwärmen. Hefe zerbröseln, mit der warmen Milch und 1 TL Zucker verrühren. Mehl in eine Schüssel geben, in die Mitte eine Vertiefung drücken und die Hefemilch hineingießen. Ein bisschen Mehl unterrühren und an einem warmen Ort abgedeckt ca. 20 Minuten gehen lassen. (Bei Trockenhefe entfällt dieser Schritt.)
Vorteig mit restlichen Zutaten zu einem glatten Teig verkneten oder bei Trockenhefe alle Zutaten verkneten. Weitere 30 Minuten gehen lassen und nochmal durchkneten. Auf einer bemehlten Arbeitsfläche zu einem Rechteck ausrollen.
In der Zwischenzeit die Mandeln karamellisieren: In einer nicht gefetteten, beschichteten Pfanne die Mandeln leicht rösten. Wenn sie beginnen, leicht nach Jahrmarkt zu riechen, den Herd ausschalten und den Zimtzucker unterrühren. Immer schön weiterrühren, bis der Zucker geschmolzen ist und die Mandeln davon überzogen sind.
Dann die Butter schmelzen und den Teig damit einpinseln. Hierauf werden nun die Mandeln sowie nach Wunsch mehr Zimtzucker verteilt. Von der breiten Seite her den Teig vorsichtig zu einer dicken Rolle ... rollen. Die Rolle in Scheiben schneiden und in eine eingefettete Backform setzen. (Man kann auch gut Muffinförmchen nehmen, wenn man die Schnecken lieber einzeln hat.) Die Schnecken noch einmal 20 Minuten gehen lassen. Im vorgeheizten Backofen (180°, Umluft 160°) 15-18 Minuten backen.
Noch warm mit dem Zuckerguss aus Puderzucker und Milch bestreichen/übergießen. Und dann genießen :o).


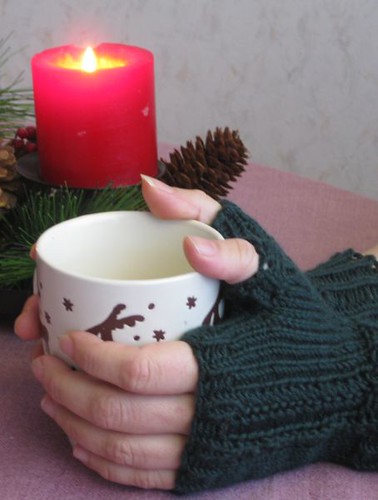
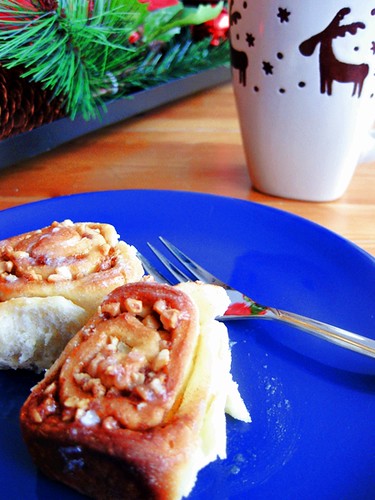
Dazu gibt es, passend zur Jahreszeit, Tee aus meiner süßen Rentiertasse (die ich aber auch schamlos den Rest des Jahres benutze).

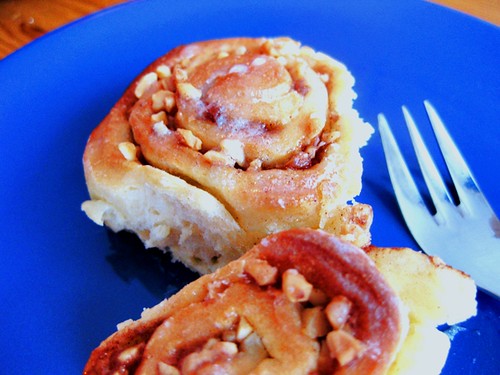
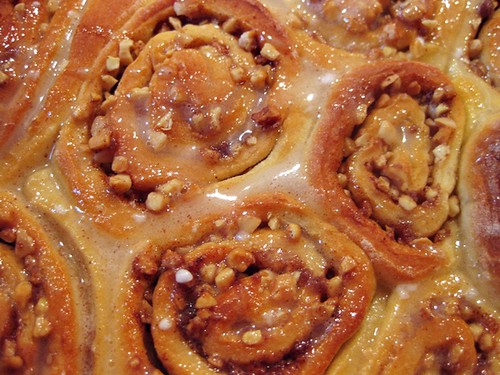
Ich habe zum ersten Mal die Zimtschnecken, statt wie sonst einzeln auf dem Blech, in einer Springform gebacken und fand das Ergebnis sehr toll. Es ist so ein schönes Gefühl, den duftenden Teig auseinander zu ziehen - und die Glasur ist so auch einfacher. Auch das war übrigens ein erstes Mal und definitiv ein Hit (die Zimtschnecken meiner Mutter, so lecker sie auch waren, wurden recht schnell trocken). Wie man sieht, waren meine Schnecken sehr klein - die kann man natürlich auch größer machen. Kleine Schnecken sind aber einfach nur ein Vorwand, warum man zwei oder drei davon auf einmal essen kann.

Und solltet ihr tatsächlich keinen Zimt mögen: Man kann das Grundrezept ganz einfach abwandeln. Zum Beispiel mit Blaubeeren und Zitrone oder mit Kürbis und Apfel (okay, letzteres Rezept enthält auch Zimt, aber es soll ja auch nur ein Denkanstoß sein ;)).

***

At this time of the year I always feel like baking (wait ... only at this time?). And so I spent some time in the kitchen last Sunday, and because I wanted cinnamon rolls, I made cinnamon rolls - with a bit of a twist so they're not only the standard cinnamon rolls. And of course I want to share the results with you!

Somehow cinnamon rolls seem to be "in" right now ... At least I have seen them make an appearance on many blogs, both English and German. This makes me happy because cinnamon rolls are a happy memory for me - one of the few things my mother likes to bake (she's not much of a baker otherwise). I used a different recipe for the dough, though, but adjusted it to my taste - most importantly, some cardamom was needed since my mother actually got her recipe from an Astrid Lindgren book, and therefore cardamom gives the cinnamon rolls the real Swedish touch. At least in my opinion :). And then I wanted something more than "only" cinnamon and sugar, and I still had some chopped almonds ...

Full disclosure: The recipe for the dough is from a Weight Watchers book. But do not fear: You won't really lose weight with these ;). Especially not if you find, like I did, that M2 does not like cinnamon rolls. I gave half of them to our landlords - and then I tackled the task of eating the rest myself. A bit too enthusiastically, maybe *cough* ...


But I'm talking too much. Here's the recipe:

Ingredients

Dough:
175 ml milk
1/2 cube of yeast/1/2 package of dry active yeast
70g sugar
380g flour
1 egg
1 large pinch cardamom

Filling:
approx. 30g sugar
cinnamon
75g chopped almonds
30g butter (or more as you wish)

Glaze:
powdered sugar
milk
(cinnamon to taste)

Warm up 50 ml milk. Crumble the yeast into the milk and mix it with 1 teaspoon of sugar. Put the flour into a bowl and make a dent in the middle. Pour yeasty milk into the dent and mix it with some flour. Cover and let rest in a warm spot for approx. 20 minutes. (If you use active dry yeast, you can skip this step.)
Mix in the rest of the ingredients for the dough and knead well. Let rest for another 30 minutes, then knead again. Roll it out on a floured surface until you have a rectangle.
In the meantime caramelise the almonds. Roast them in a coated pan without oil until they begin to smell faintly burned. Turn off the stove and pour in the cinnamon and sugar. Keep stirring until the sugar has melted and the almonds are well-coated.
Melt the butter and brush the dough with it. Distribute the almonds more or less evenly on it (add more cinnamon and sugar if you like). Roll up the dough, starting from the longest side. Cut into thick slices and arrange in a baking pan. (You can also use cupcake liners in a muffin tin if you prefer individual small rolls.) Let rest another 20 minutes. In your preheated oven, bake at 180° (160° convection oven) for 15-18 minutes. Take out and while they are still warm, pour or brush the glaze made from powdered sugar and milk over them. And now ... enjoy ;o)!

In the spirit of the season, I enjoyed them with tea in my cute reindeer mug (which I also use shamelessly all year long).

I made the rolls in a baking pan for the first time instead of using a baking sheet as I normally do, and I really liked them that way. It's so nice to pull apart the lovely, soft dough - and the glaze is much easier this way, too. That was another first and definitely a hit (my mother's cinnamon rolls, as lovely as they are, got dry rather quickly). As you can see, my rolls were pretty small - but that's nothing but an excuse to eat two or three at once!

And if you actually don't like cinnamon: You can easily adjust the basic recipe with some other ingredients. For example with blueberries and lemon or with pumpkin and apple (okay, the second one has cinnamon, too, but just take it as inspiration and roll with it ;)).

Sonntag, 2. Dezember 2012

Weihnachtskleid-Sew-Along, Woche 2

Letzte Woche erfuhr ich auf dem Blog von Ms Fisher Goes Handmade, dass es dieses Jahr einen Weihnachtskleid-Sew-Along gibt (letztes Jahr wohl auch schon, aber davon habe ich nichts mitbekommen ;)). Der Sew-Along war schon im Gange, und ich war schon enttäuscht - bei einem Sew-Along wollte ich immer schon mitmachen, und was Nettes bis Weihnachten nähen? Kann so verkehrt nicht sein!

Dann entdeckte ich aber in der heutigen Linksammlung, dass offenbar Quereinsteiger immer noch willkommen sind. Yay! Und damit stand fest, womit ich mich heute beschäftige und was ich heute Abend poste :).

Last week I learned on the blog of Ms Fisher Goes Handmade that there is a Christmas dress sew-along for this year (there seems to have been one last year, too, but I didn't hear anything about it then ;)). The sew-along was already up and running, and I was pretty disappointed - I always wanted to take part in a sew-along, and sewing something nice for Christmas? That can't be wrong!

However, today I learned in the link party that you could still join. Yay! And so I knew what to do today and what to post about in the evening :).

Das Thema heute lautet:

2.12.2012:
Weihnachtskleid-Sew-Along Teil 2: Jetzt geht's los!
Ich habe schon angefangen, es wird toll! / Meine Stoffe kommen hoffentlich morgen ... / Ich habe mich für diesen Schnitt entschieden, schaut mal. / Ich glaube, der Schnitt passt mir doch nicht, oder was meint ihr?

Today's topic was:
2/12/2012:
Christmas dress sew-along part 2: Let's start!
I already started, it will be great! / I hope my fabric will arrive tomorrow ... / I decided to take this pattern, have a look! / I think this pattern doesn't suit me after all - what do you think?

Meine Entscheidung für einen Schnitt und einen Stoff fiel recht schnell - ehrlich gesagt benutze ich den Sew-Along, um einen schon lange geplanten Rock, für den ich auch schon seit Jahren den Stoff besitze, endlich mal zu nähen. Und zwar soll es ein Fishtail-Skirt werden.

Vor einigen Jahren kaufte sich meine Mama nämlich so einen. Wir haben einen sehr unterschiedlichen Klamottengeschmack (sie liebt Hosen, ich Röcke, ihre Farben sind braun, rot und andere Naturfarben, meine sind Blautöne, Dunkelgrün und Dunkelrot und viele Muster, usw. ...), aber bei diesem Rock wusste ich sofort: So einen will ich auch! Wenig später fiel mir dann im Stoffladen etwas Stoff in die Hände, der perfekt dafür war. Tja, und dann landeten der Stoff und die Idee in der Kiste und blieben da bis heute ...

I quickly decided on a pattern and fabric - let's be honest, I'm using the sew-along to finally sew a skirt I had been planning for a long time and for which I have had the fabric since years. It will be a fishtail skirt.

That's because my Mama bought such a skirt some years ago. We have a very different taste in clothes (she loves trousers, I love skirts, her colours are brown, red and other nature colours, mine are blues, dark green and red and lots of patterns, etc.) but with this skirt I knew at once: I want one, too! A little bit later, I happened on some fabric which would be perfect for it, too. And then the fabric and the idea were put into a box and stayed there until today ...


Links: Dunkelrot und elastisch - Jersey, denke ich, aber nach so vielen Jahren bin ich mir nicht mehr sicher. Rechts: Dunkelrot mit großen Blumen, etwas dicker - Baumwolle, denke ich.

Left: Dark red and elastic - Jersey, I think, but after so many years, I'm not sure.
Right: Dark red with big flowers, a bit thicker - cotton, I think.


Großaufnahme von dem Blumenmuster

Close-up of the flower pattern

Ich bin ja gut drin, mir Sachen immer selber zusammen zu basteln, aber ganz ohne Schnitt geht es hier schon nicht. Daher habe ich gesucht und wurde fündig bei Natron & Soda. Was mir bei den Anleitungen dort gut gefällt (soweit ich es vom Lesen her beurteilen kann - das ist das erste Mal, dass ich danach nähe und mir nicht nur Inspiration hole), ist, dass schön erklärt wird, wie man den Schnitt an seine Maße/Bedürfnisse anpasst.

Also habe ich erst mal in mein Ideen-Büchlein eine Skizze gemacht und alle Maße für mich berechnet:

I am very good in putting things together my way but I didn't think I could do this completely without a pattern. Therefore, I looked for one online and found one on Natron & Soda. I like about their instructions/patterns (as far as I can tell from reading - this is the first time I will actually use one and not just get some inspiration from the site) that they explain very well how adjust the pattern to your size/needs.

So I first made a sketch in my idea notebook and calculated all measurements for me:


Und damit ihr noch was zum Lachen habt: So sehen bei mir Design-Skizzen aus.

And so that you have something to laugh: That's what my design sketches look like.


(Wie man vielleicht erkennt, schwanke ich noch, was den Verschluss/Bund angeht. Nun, das kann ich mir noch ein Weilchen überlegen.)

Dann ging es daran, den Schnitt zu konstruieren. Passendes Kopierpapier oder so hatte ich natürlich nicht, aber wozu ist man erfinderisch? Mit Uhu und Geduld und Spucke bastelte ich mir aus normalem Papier ausreichend große Vorlagen zusammen.

(As you can probably tell, I'm still unsure how to do the fastening/waistband. Well, I have some time left to decide.)

Next I had to construct the pattern. Of course I didn't have suitable copy paper or something but there's always a way. I just put together patterns in the right size with some glue and normal printer paper.


Und so sah das Endergebnis dann aus: Bereit zum Zuschneiden!

And that was the final result: Ready for cutting!


Das muss allerdings noch etwas warten, denn nachdem der Stoff, den ich gestern gewaschen hatte, trocken war, wollte ich M2 etwas Gutes tun und dafür sorgen, dass sie heute Abend Vorhänge hat, um ihr Zimmer abzudunkeln. Zuschnitt und mehr kommt also nächste Woche.

(Und nachdem ich die Vorhänge fertig hatte, stellten wir fest, dass ich die falschen Gardinendinger gekauft habe - zu groß. Fail.)

That will have to wait a bit, though, since I wanted to do something nice for M2 after the fabric I washed yesterday had dried: Make sure she has curtains this evening to darken her room. Cutting and more will follow next week.

(And after I had finished the curtains, we realised that I had bought the wrong curtain thingies - too big. Fail.)

Und jetzt mal sehen, was der Rest so ausbrütet :).

And now I'll have a look what the rest is up to :).

Samstag, 1. Dezember 2012

OT: Spendenaktion beim MMM

Ihr wisst ja, wie das jedes Jahr um Weihnachten herum ist: Auf einmal fordern x Hilfsorganisationen, wenigstens in dieser Zeit mal an andere zu denken. Manch einer ist davon vielleicht schon genervt ... Trotzdem möchte ich an dieser Stelle auf eine Aktion aufmerksam machen. Und zwar hat der Me Made Mittwoch-Blog zu Spenden für betterplace.org aufgerufen.

Die Spenden gehen hierbei an ein Projekt in Marokko, in dem Frauen die Chance auf eine Ausbildung als Näherin für Lederarbeiten erhalten. Damit erhalten sie die Chance, der hohen Arbeitslosigkeit und dem Analphabetismus besonders unter Frauen in dem Land zu entgehen und gleichzeitig eine alte Tradition wieder aufleben zu lassen.

Ich finde das eine sehr schöne Idee und sorge gern dafür, dass vielleicht noch jemand von diesem Projekt erfährt, der ein paar Euro übrig hat. Die Spendenaktion wurde heute morgen auf dem MMM-Blog veröffentlicht, und bereits jetzt ist das Spendenziel zur Hälfte erreicht. Das heißt aber nicht, dass jetzt keine Spenden mehr erforderlich sind - Ziele kann man immer übertreffen ;).

(Ich bin leider zu doof, um das Widget für die Aktion hier einzubinden - bitte begebt euch also selbst zum MMM-Blog und spendet dort!)

Mittwoch, 28. November 2012

WIP Wednesday I

Immer mittwochs will ich hier zeigen, woran ich gerade so arbeite. Nicht zuletzt sollte mich das motivieren, auch tatsächlich etwas zu arbeiten, denn ich will ja nicht immer die gleichen unfertigen Sachen zeigen :).

Every Wednesday, I want to show what I am working on right now. Among others, this is intended to keep me on my game because I don't want to show the same half-finished stuff all the times, after all!


Los geht's mit Schlappen für eine Freundin - Besucherschlappen für ihre Besuche im Hause M&M. Sie wollte es gern bunt, also gibt es ein Log Cabin in knalligen Farben, aber ohne Muster. Nur das Binding bringt noch etwas Muster ins Spiel.

(Ich habe immer noch keine zündende Idee für das Design für Schlappen für den anderen Freund, der hier regelmäßig zu Besuch ist. Er sagt zwar, er braucht keine, aber hat mich das je abgehalten?)

First up are some slippers for a friend - guest slippers for her visits at Casa M&M. She wanted to have them colourful, so she gets a Log Cabin in bold colours but without any pattern. Only the binding adds a bit of pattern to the mix.

(I still don't have the right idea for a design for slippers for the other friend visiting us regularly. He tells me he doesn't need any but did that ever stop me?)


Und dann gibt es noch einen Blick auf ein Projekt, das viel zu zeitaufwendig, viel zu fisselig und viel zu unnütz ist - Patchwork. Ganz viel davon. Brauche ich eine Patchworkdecke? Nö. (Meine mittlerweile über zehn Jahre alte ist immer noch ganz schön.) Habe ich ganz viele andere Projekte, die mehr Aufmerksamkeit benötigten als das Aneinanderreihen kleiner Quadrate? Ja. Kümmert mich das? Nein.

Mal sehen, ob ich bis zum nächsten Mal noch ein paar Streifen oder vielleicht sogar den nächsten Block fertig bekomme.

Das war es tatsächlich auch schon für diese Woche. Mehr habe ich gerade nicht in Arbeit - wenn man nicht ein paar unfertige Skizzen, die ich ohnehin vor Weihnachten niemanden zeigen kann, und meine Spindel (die etwas mehr Garn als auf dem Bild hier enthält) zählt. Ach ja, und dann gibt es noch viele Meter Stoff, die darauf warten, am Wochenende in Vorhänge verwandelt zu werden. Aber so spannend ist das ohnehin nicht ;).

And here's a look at a project needing too much time, too much work and being rather useless - patchwork. A lot of it. Do I need a quilt? No. (The one I have which is over ten years old by now is still nice.) Do I have a lot of other projects which would need more attention than joining a lot of small squares? Yes. Do I care? No.

We'll see if I can finish another few rows or maybe the next block until next time.

And that's it for this week. I'm not working on more than that right now - unless you count a few unfinished sketches I cannot show to anyone before Christmas anyway and my spindle (which now holds a bit more yarn than on this picture). Oh yes, and there are a lot of yards of fabric waiting to be turned into curtains on the weekend. But that's not very exciting anyway ;).

Montag, 26. November 2012

Häkelwindlicht


Ich hatte zwei kleine einfache Windlichter/Teelichthalter aus Glas, die ich ein wenig langweilig fand. Ursprünglich gehörten zu ihnen mal weihnachtlichen Hüllen aus rotem und grünem Papier, aber die sind wohl im Zuge meines Umzugs verloren oder kaputt gegangen.

Was also tun?

Nun, ich hatte da noch diesen riesigen Ball weißer, selbstgesponnener Wolle, bei dem mich M2 immer fragte, was ich damit machen will ...

Und so schnappte ich mir eine Häkelnadel - ich korrigiere: kaufte ich mir eine Häkelnadel, die nicht zu dünn war, nachdem ich nur eine sehr dünne hatte - und fing an zu häkeln.

I had two small simple tea light glass holders I found a bit boring. Originally they had christmas-y envelopes of red and green paper but they seem to have gotten lost or ruined in the course of my move.

So, what to do?

Well, I also had this big ball of white, self-spun wool M2 keeps asking me about what I intend to do with it ...

And so I took a crochet hook - let me rephrase: I bought a crochet hook of the right size since I only had one which was far too thin - and started crocheting.


Das erste Windlicht umhäkelte ich mit einfachen halben Stäbchen.

Man muss dazu sagen, dass ich bestimmt vor fünf Jahren das letzte Mal gehäkelt hatte, also musste ich mich wieder reinfinden und habe mich erst mal nicht an Muster gewagt.

The first tea light holder was made with simple half double crochet stitches.

You have to know that it had been at least five years since I last crocheted so I took it slow and did not attempt any patterns for this.


Für das zweite gab es ein bisschen Muster - ein Muschelmuster in Groß und Klein. Dadurch war die Hülle nicht ganz so eng anliegend wie die andere, aber ich finde den Effekt ganz schön. Hat etwas von einer leichten Tulpenform.

The second tea light holder got a bit of a pattern - a shell pattern in two sizes. Therefore the wrap did not turn out quite as fitting as the other but I like the effect. It gives it a bit of a tulip shape.


Noch schöner sind sie freilich beleuchtet :).

But of course they are much prettier when lit up :).


Jetzt bin ich fast traurig, dass ich keine weiteren Gläser habe, die ich umhäkeln kann ... Aber das lässt sich vielleicht ändern. Man kann bestimmt auch schöne Marmeladengläser und ähnliches so in hübsche Windlichter verwandeln!

Now I am almost sad that I don't have more glasses to decorate with a crocheted sleeve ... But that might be easy to rectify. I'm sure that you could also turn nice jam jars and similar in pretty tea light holders like that!

Freitag, 23. November 2012

A Touch of Pink


Diesen Strang Wolle habe ich gestern fertig gestellt. Ich hatte die rosa Wolle neulich von der Spindel nehmen müssen, da leider der Wirtel der Spindel lose war :(. Daher habe ich mich entschlossen, die Wolle gleich zu zwirnen und nicht zu warten, bis ich den Rest des Zugs versponnen hatte.

Somit habe ich sie mit weißer Wolle verzwirnt, die ich schon länger herumliegen hatte. Sie ist vierfädig verzwirnt - drei Fäden weiß, ein Faden rosa, was diesen schönen Effekt gibt. Das Endergebnis gefällt mir sehr gut.

I finished this skein of wool yesterday. I had to take the pink wool from the spindle recently since the whorl of the spindle was coming loose :(. Therefore I decided to ply the wool immediately and not to wait until I had finished spinning the rest of the roving.

Therefore, I plied it with some white wool I had lying around for some time. I used a 4-ply - three plies in white and one ply in pink, resulting in this nice effect. I really like how it turned out.


Der Strang ist allerdings etwas klein, um viel damit zu machen - es sind knapp 60 Meter, die nur 30g wiegen. Allerdings gibt es dafür eine einfache Lösung :):

The skein is a bit small to do much with it, though - approx. 60 metres, weighing in at only 30g. However, there's a simple solution to that :):


Da die rosa Wolle eine Zugabe war, als ich die abgebildete Spindel gekauft habe, weiß ich leider nicht, was für eine Wolle ist - und die weiße Wolle habe ich schon so lange, dass ich es bei ihr auch nicht mehr weiß.

Since the pink wool was a present from the seller of the spindle pictured above, I don't know what type it is - and I had the white wool for such a long time that I don't know what it is, either.

Mittwoch, 21. November 2012

Hallo und willkommen! ./. Hello and welcome!


Wer bin ich?
Mein Name ist Mareike, aber im Internet bin ich meistens unter dem Namen Flowerstar unterwegs, oft auch nur als Flower. Im Zweifelsfall höre ich auf alles drei oder auch auf "Hey du!" ;). Ich bin derzeit 32 Jahre alt, Übersetzerin von Beruf und lebe in einer WG mit meiner besten Freundin in Hirschlanden, einem kleinen Örtchen bei Stuttgart. In diesem Blog möchte ich euch an meinen kreativen Ausflügen teilhaben lassen.

Who am I?
My name is Mareike but online I'm mostly known under the name Flowerstar, often shortened to Flower. When in doubt, just call me any of those or just "Hey, you!" ;). I'm 32 years at the moment, a translator by trade and I'm sharing a flat with my best friend in Hirschlanden, a small town near Stuttgart (Germany). I hope to share my creative activities with you on this blog.

Was findet man hier?
In Sachen Kreativität bin ich ein bisschen ein Hansdampf-in-allen-Gassen: Ich probiere wahnsinnig gern Neues aus und habe immer wieder Phasen, in denen ich mich wild auf eine bestimmte Sache stürze, die dann irgendwann wieder für etwas anderes, Aufregendes abgeschrieben wird.

Nähen ist für mich eindeutig die wichtigste Handarbeit und mein liebstes kreatives Hobby. Ich nähe mir einen großen Teil meiner Garderobe selbst, seit ich 13 oder 14 Jahre alt bin. Meine "Spezialität" sind Röcke und Kleider, aber auch Patchwork und Accessoires fabriziere ich gern.

Ansonsten mache ich aber so gut wie alles, was mit Stoffen, Garnen und Co. zu tun hat. Dazu gehören unter anderem: Spinnen, Stricken, Häkeln, Brettchenweben, Sticken (besonders Kogin-Zasshi, eine japanische Sticktechnik) ... Und viel mehr steht noch auf meiner Liste der Dinge, die ich unbedingt einmal ausprobieren möchte.

Gutes Essen ist eine weitere Leidenschaft. Ich koche und backe sehr gern - in Sachen Kochen fällt es allerdings meistens eher unter "einfach und schnell". Insofern werden es eher Kuchenrezepte sein, die sich hier wiederfinden. (Eine Zeit lang habe ich gern Bento gemacht, aber da ich jetzt zuhause arbeite, bietet sich mir dafür leider nicht mehr die Gelegenheit.)

Zeichnen und Schreiben gehören ebenfalls zu meinem Leben. Sie stehen meistens in enger Verbindung mit einem weiteren Hobby, nämlich dem Rollenspiel. Daher werden euch wahrscheinlich viele der Charaktere unbekannt sein, um die es dabei geht - aber hoffentlich gefallen euch die Bilder und Geschichtchen trotzdem.

Und nicht zuletzt soll es hier auch Fotos geben - in erster Linie natürlich von den Produkten meiner Kreativität, aber auch sonst über alles, was um mich herum so vorgeht.

Viel Spaß!

What will you find here?
As a creative person, I'm a bit of a jack-of-all-trades: I love trying out new stuff and always go through phases where I'm totally enamoured with one thing which soon falls out of favour when something new and fresh comes along.

Sewing is the most important craft for me, no doubt about that, and it's my favourite creative hobby. I have been sewing a big part of my wardrobe myself since I was 13 or 14. I "specialise" in skirts and dresses but also love doing patchwork or sewing accessories.

But otherwise I do almost everything to do with fabric, yarn and so on. This includes, among others: Spinning, knitting, crocheting, tablet weaving, embroidery (particularly kogin-zasshi, a Japanese embroidery technique) ... And there is much more on the list of things I really want to try one day.

Good food is another passion. I love cooking and baking - cooking is mostly a matter of "quick and easy", though, so it will be mostly cakes and cookie recipes that will be found here. (I also used to do bento but since I'm working from home now, I no longer have the opportunity, sadly.)

Drawing and writing are part of my life, too. They are mostly closely connected to another hobby, namely roleplaying. Therefore, you might not be familiar with many of the characters depicted - but I hope you like the pictures and little stories anyway.

And finally, there will be photos - first and foremost of my creative stuff, of course, but also about everything going on around me.

Enjoy!