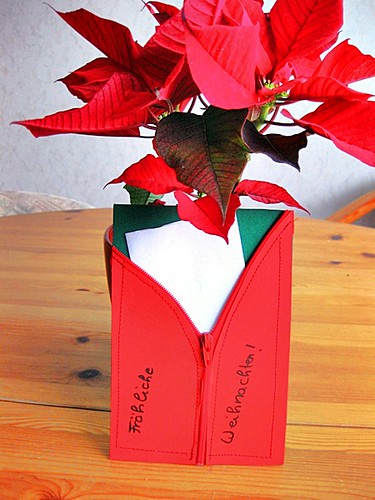
Unter anderem entstand heute noch schnell diese kleine Geschenkgutschein-Hülle. Ich finde die Idee ganz witzig und bin froh, dass es halbwegs so geklappt hat, wie ich mir das vorgestellt habe.
Tomorrow the wait is over! Today I finished my last preparations and I'm pretty happy that some things worked out in the end. Among others, I finished my Christmas Dress Sew-Along skirt - I couldn't take pictures yet, though, so I'll catch up on that after Christmas.
Among others, I made this little gift certificate sleeve today. I think the idea is quite funny and I'm happy it turned out more or less as I imagined it.
Man braucht:
* einen Reißverschluss (beliebige Länge - ich habe den kürzesten genommen, den ich hatte)
* Tonkarton
* einen Gutschein
* nach Wunsch Verzierungen (ich habe die Hülle schlicht gehalten, aber man kann sich sicher mit Washi-Tape und Stempeln usw. daran austoben, wenn man möchte)
Zuerst habe ich den Karton für Rück- und Vorderseite zugeschnitten. Dazu habe ich einfach eine Weihnachtskarte als Vorlage genommen, damit die Größe etwa hinkommt.
Anschließend habe ich auf dem Karton für die Vorderseite den Reißverschluss etwa so drapiert, wie ich mir die Öffnung der Hülle vorgestellt habe. Den Verlauf habe ich grob auf dem Karton aufgezeichnet und ihn dann dementsprechend zugeschnitten. Dadurch bekam ich zwei Teile, einmal für links und einmal für rechts. Der dritte Teil, wo die Öffnung sein sollte, ist überflüssig und kommt weg.
You'll need:
* a zipper (of any length - I took the shortest I had)
* construction paper
* a gift certificate
* decorations, if you want (I kept the sleeve simple but you could go nuts with washi tape and stamps if you like)
First, I cut the paper for the back and front. I simply traced it with another Christmas card to make sure it was the right size.
Then I placed the zipper on it like I wanted the opening to look like and marked the course of the zipper with pencil, cutting it out along the lines. You now have two parts, one for the left and one for the right side. The third part we won't need any more - that's where the opening will be.

Mit der Nähmaschine wird nun der Reißverschluss an die beiden Stücke der Vorderseite angenäht und dann das Ganze auf der Rückseite festgenäht. Überstehende Stücke abschneiden, den Gutschein in die Hülle schieben - et voilà!
Now you sew the zipper to the two parts of the front with the sewing machine and then sew the whole thing to the back. Cut off everything protruding at the edges and insert your gift certificate in the sleeve - voilà!
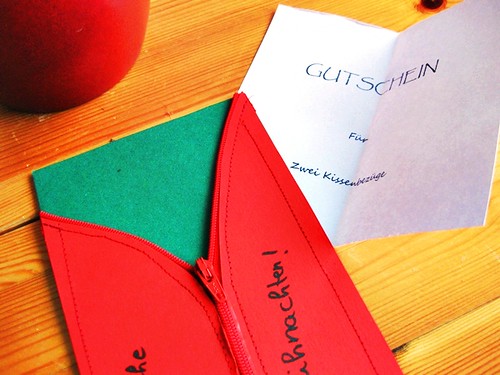
Ich finde die Idee besonders witzig für Gutscheine für etwas Genähtes, wie hier :). (Keine Sorge, die Beschenkte weiß ohnehin, was sie bekommt - aber es ist auch extrem unwahrscheinlich, dass sie sich hierher verirrt *g*.)
Wollt ihr noch einen kleinen Blick darauf werfen, wie meine Geschenke dieses Jahr sonst so aussehen?
I think the idea is quite cute especially for gift certificates for something sewn by you, like this one :). (Don't worry, the person who gets this knows what she gets anyway - but it's extremely unlikely she'll find this, too *grin*.)
Do you want to have a look what my other presents look like this year?
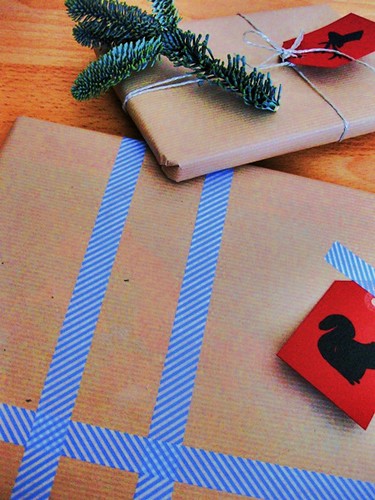
Dieses Jahr habe ich es mit Packpapier schlicht gehalten und dafür lieber mehr verziert, mit Washi-Tape, Tannenzweigen und süßen Tags.
Und dazu gibt es noch Plätzchen-Tüten.
This year, I kept it simple with kraft paper and rather went for decoration with washi tape, fir twigs and cute tags.
Also, there are Christmas Cookies for everyone.

Ich wünsche euch allen fröhliche Weihnachten! Feiert schön und genießt die gemütlichen freien Tage mit euren Lieben!
Have a wonderful Christmas, everyone! Have fun and enjoy the cosy free time with your loved ones!
Washi Tape: Blueboxtree
Washi Tape: Blueboxtree
Geschenkband: Rossmann
Tags: Freebie von theinspiredroom.net
tolle Ideen! :)
AntwortenLöschenVielen Dank, Laura :)!
Löschen